You have a 3D model and want to turn it into a good first print. The slicer determines how the printer builds it layer by layer. This guide covers the settings that matter, how to inspect the first layer and which problems to rule out first. The examples are for FDM/FFF printing; resin is outside the scope of this guide.
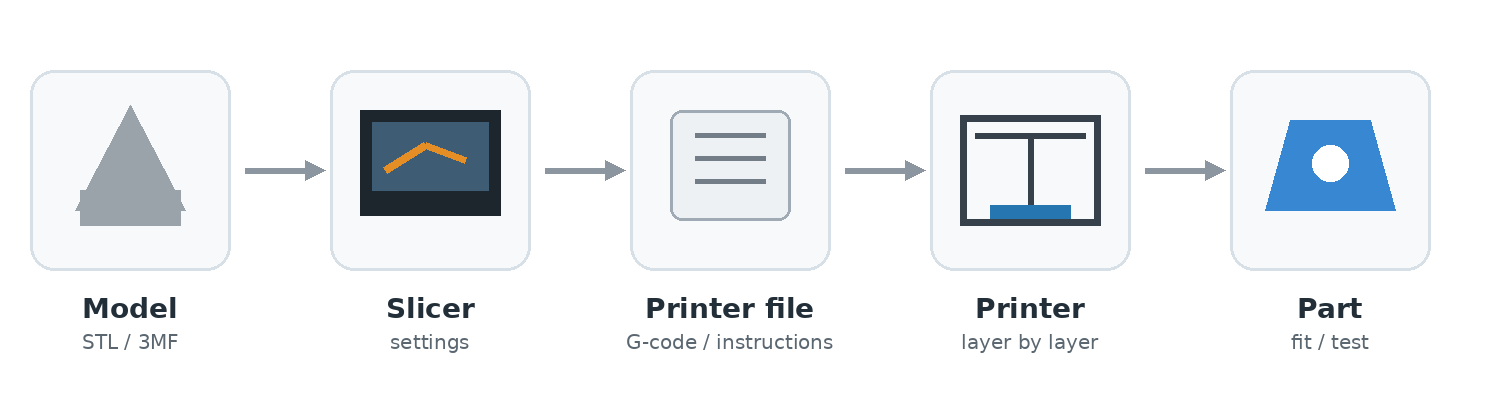
Three rules help almost every time: start with a reliable default profile, inspect the first layer and change one setting at a time when troubleshooting.
1. From model to print
An STL mainly contains geometry. It knows nothing about your printer, filament or desired quality. A 3MF can also store units, multiple objects and — depending on the slicer — project and print information. The slicer divides the model into layers and calculates nozzle motion, extrusion, supports and speed. The result contains machine instructions: often G-code, sometimes a proprietary packaged printer format.
Do not open an STL with a random profile and immediately press Print. The model is the shape; slicer settings determine how that shape is built.
2. Check three profiles first
For PLA and PETG, the supplied profiles for a modern printer are often a good start. Print with defaults first and calibrate only when a problem is repeatable.
- Printer profile: correct machine, nozzle size and build plate.
- Filament profile: material, temperature, cooling, flow and material limits.
- Print or process profile: layer height, walls, infill, supports, speed and quality.
3. Orient the model deliberately
First consider the direction in which the part will be loaded. FDM is anisotropic: bonding between layers is often weaker than material within a layer. A large face on the bed usually improves stability, but is not automatically the best orientation for strength or dimensional accuracy. Avoid placing a visible face on supports if possible; contact can leave marks. Holes and bridges may also print much better in one direction than another.
4. Set layer height, walls and infill
For an ordinary print, these are useful starting points, not hard laws:
| Setting | Starting point | Effect |
|---|---|---|
| Layer height | 0.20 mm with a 0.4 mm nozzle | Lower means more detail and longer print time. |
| Walls | 3–4 for normal functional work | More walls often strengthen a part more efficiently than extreme infill. |
| Top and bottom layers | 4–6 layers | Too few top layers can leave holes above infill. |
| Infill | 15–20% for many prints | Supports the inside; 100% is rarely needed. |
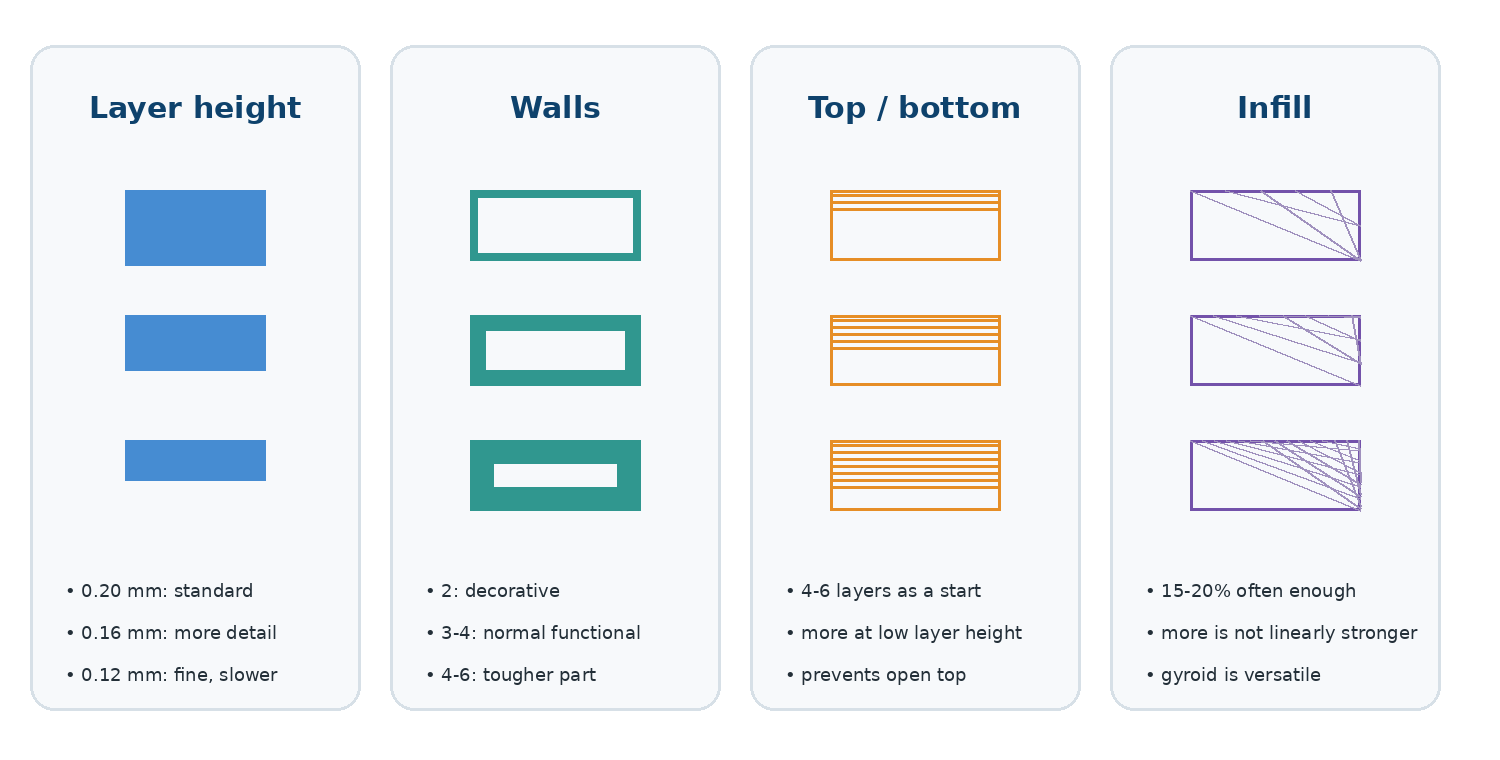
A thin display model, heavily loaded bracket or large flat box may need other values. Judge the function, geometry and load.
5. Use supports, brim, skirt and raft deliberately
First orient the model to minimise supports. Normal supports are predictable; tree/organic supports are often easier to remove around organic shapes. A support interface can improve the contact surface but costs time and material.
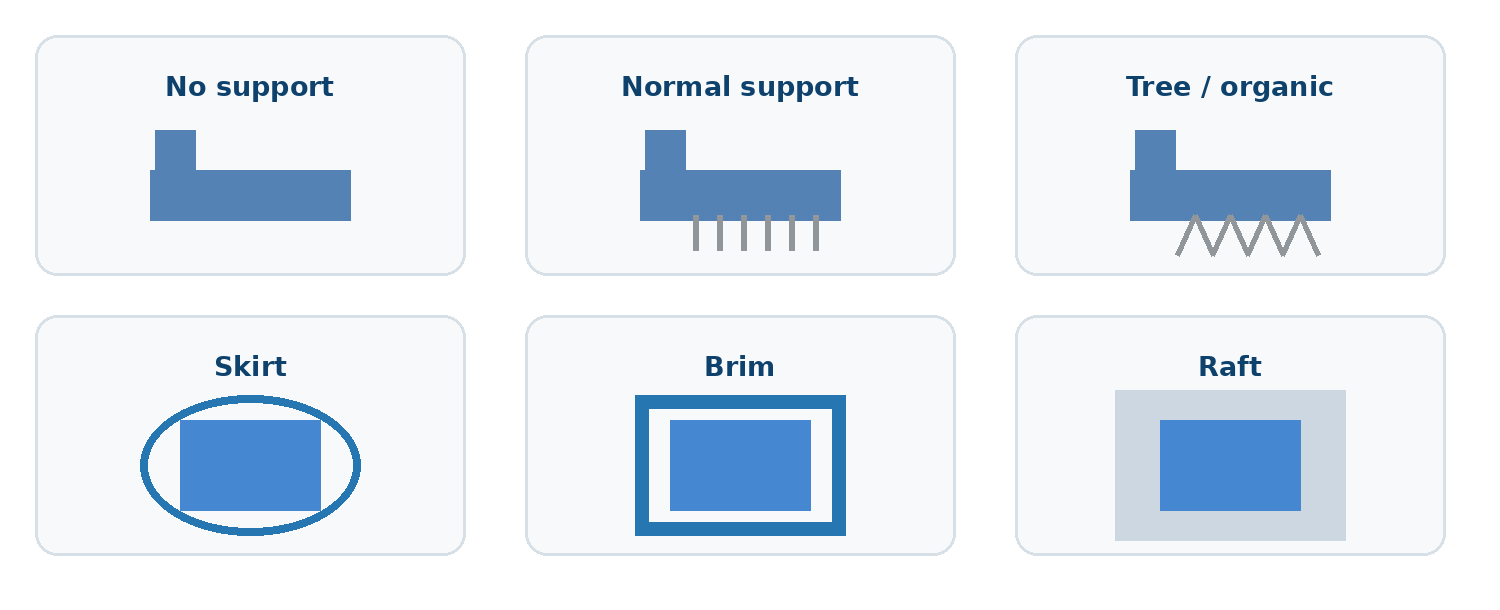
- Skirt: a separate line around the model to prime the nozzle.
- Brim: an extra edge attached to the part for better bed adhesion.
- Raft: a complete sacrificial base; rarely the first choice today.
6. Keep temperature, cooling and speed at profile defaults first
Initially use the filament profile supplied by the manufacturer or slicer. The right temperature depends on the exact filament, hotend, speed and required properties. Too cold can cause underextrusion and poor layer bonding; too hot may cause stringing, soft surfaces or blurred details. Fast printing works only if the hotend can melt enough plastic per second. Excessive volumetric flow may cause weak layers or underextrusion.
Leave maximum volumetric rate, pressure advance, manual retraction, acceleration, jerk and flow ratio alone for now when the default profile prints well.
7. Clean the build plate and inspect the first layer
Touch the printable surface as little as possible: skin oil can reduce adhesion. Warm water and ordinary dish soap are often effective for deep cleaning; dry with a clean lint-free cloth. IPA may help between prints if the plate manufacturer allows it. Select the correct build plate in the slicer. Glue is not automatically required; with some plate/material combinations it acts as a release layer. Follow the manufacturer.
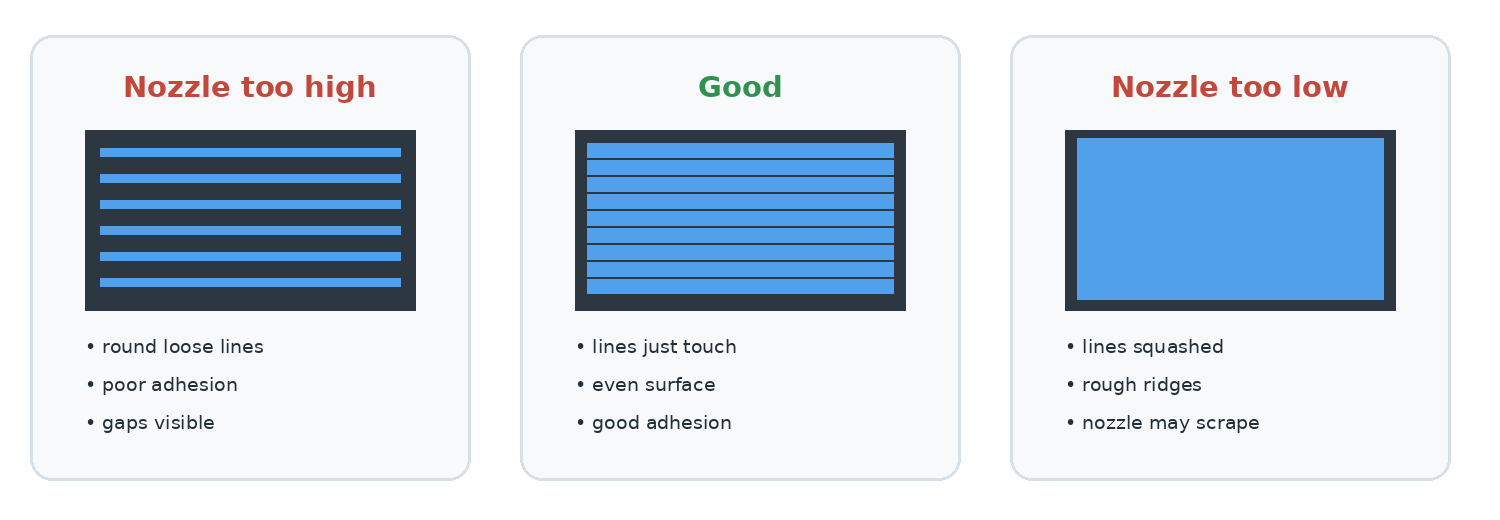
A bad first layer rarely fixes itself. Stop early if lines do not stick, curl up or are squashed excessively.
8. Inspect slicer Preview before Print
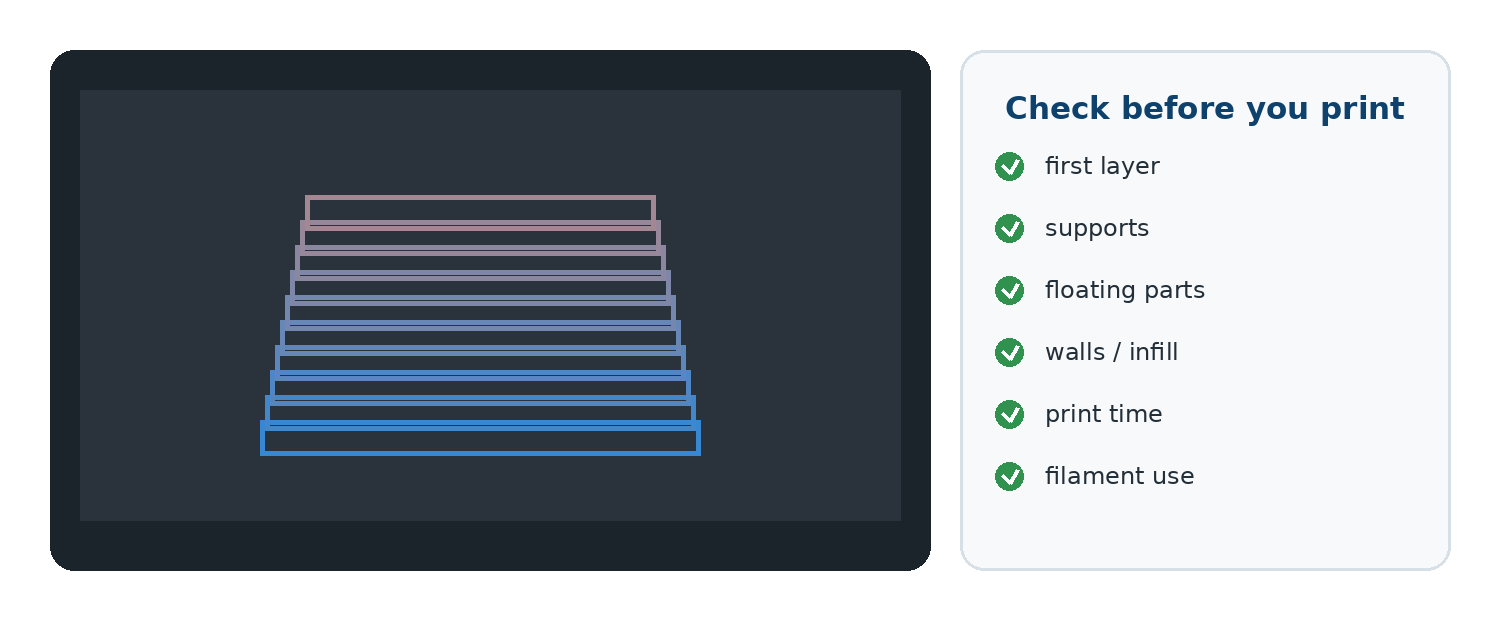
Scrub through the preview layer by layer. Check the first layer, floating islands, support reach, walls, infill and top/bottom layers. Also inspect estimated print time and filament use. For multicolour prints, look for purge/waste and unnecessary colour changes.
9. Troubleshoot from simple to complex
Start with the correct plate, a clean bed, dry filament and the right profile before changing obscure settings.
| Problem | Check first | First action |
|---|---|---|
| Print detaches | Dirty/cold bed or poor adhesion | Clean the bed, use the right bed temperature, add a brim if needed. |
| Stringing | Temperature, wet filament, retraction | Dry the filament and check temperature. |
| Warping | Temperature gradient or drafts | Check bed temperature and consider a brim or enclosure. |
| Bad first layer | Z-offset, bed, wrong plate | Clean the bed and check plate/profile. |
| Rough surface or underextrusion | Too fast, too cold or wet filament | Slow down, check the profile, dry the filament. |
Wet filament can cause several symptoms at once: stringing, rough surfaces, popping at the nozzle and weaker layer bonding. PETG, TPU and nylon are particularly sensitive.
10. Remove and inspect the part
Let the bed cool before removing the print when possible. Remove supports carefully; wear eye protection if hard fragments might fly off. Deburr sharp edges with suitable tools and cut away from your body. Inspect functional parts for cracks, layer splits, bonding and dimensions before installation. Measure critical dimensions with calipers.
Store filament sealed with desiccant. If PETG, TPU or nylon suddenly prints worse than before, suspect moisture first. After a failed print, change one variable and test with a small part before starting another long job.
11. Short checklist before an important print
- Are the printer, nozzle, build plate and filament profiles correct?
- Is the model oriented for strength, visible surface and minimal supports?
- Do layer height, walls, top/bottom layers and infill fit the part’s purpose?
- Is the bed clean and is there enough suitable filament?
- Have you inspected Preview, print time and filament use?
- Can you watch the first layer at the printer or through a camera?
Good slicing is mostly careful observation. Start simply, use reliable profiles and make changes only when you know which problem you are trying to solve.