
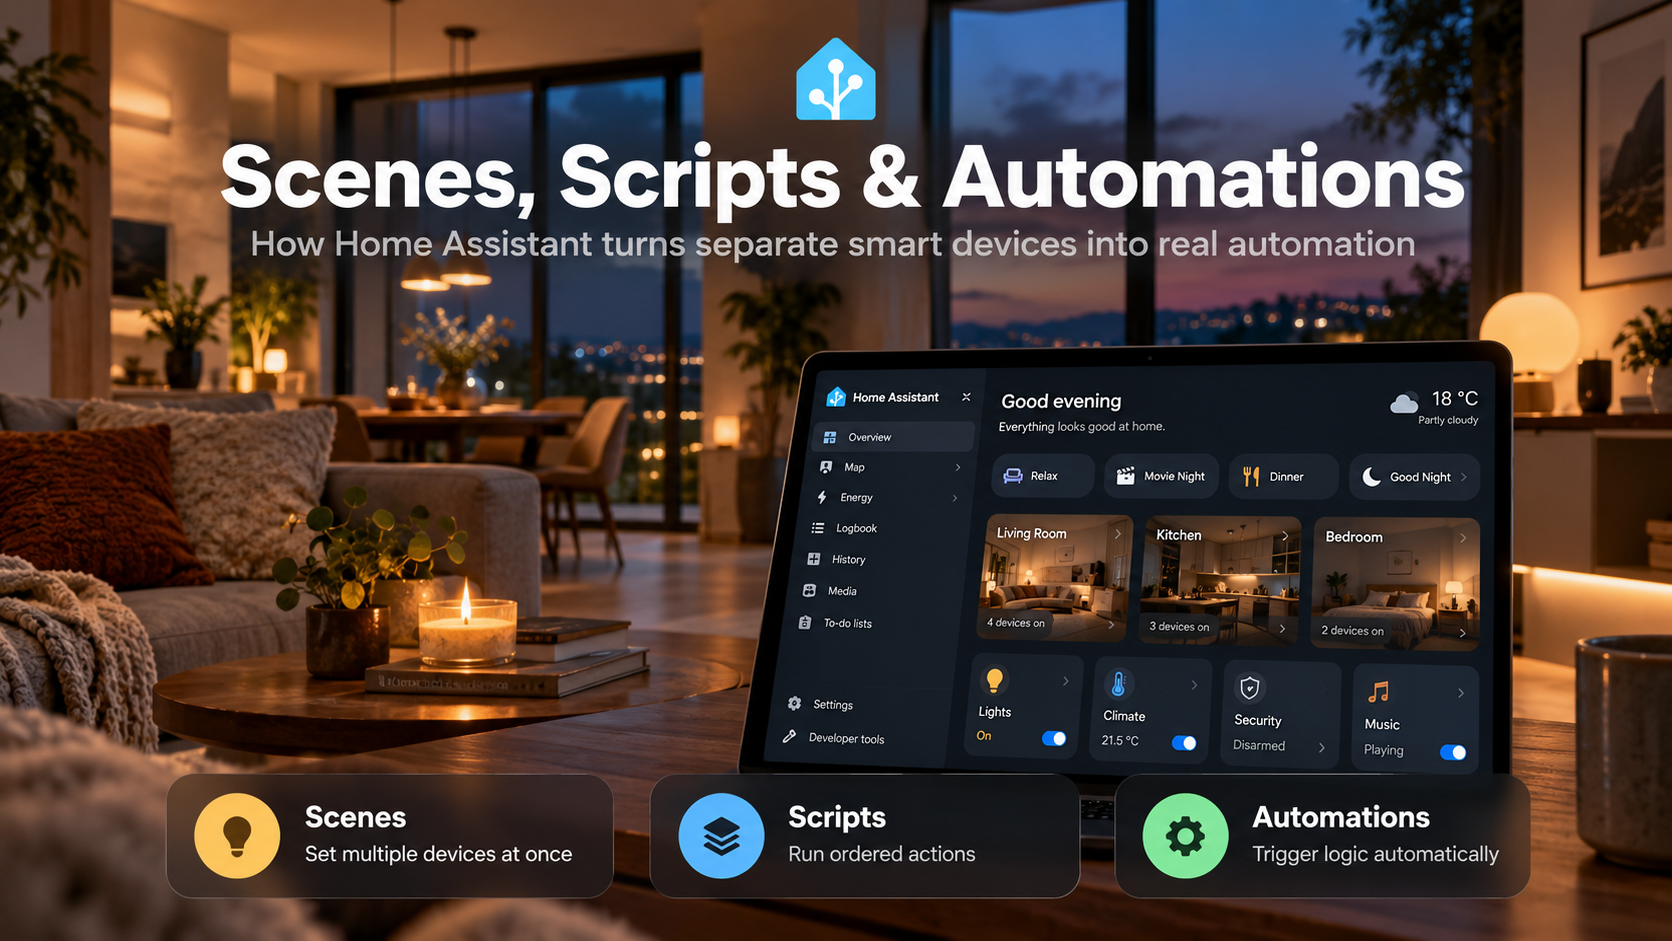
A complete beginner’s guide to Home Assistant 2026.10.2 – from your first trigger to reusable scripts, scenes, blueprints and reliable automations.
Version and scope. This edition is based on Home Assistant 2026.10.2 and the official documentation available on 22 October 2026. Patch 2026.10.2 contains bug fixes; the functional automation changes arrived in the 2026.10 release. At the October 30, 2026 review, 2026.10.4 was the latest published patch in the 2026.10 series; the examples have not been retested on that version. Consult current release notes if the interface differs. You do not need to know YAML to get started: first you learn the visual editor and its logic. YAML is included as learning and reference material.
The building blocks
1. The five building blocks: what goes where?
Several Home Assistant tools overlap. Beginners should first understand the role of each component. The official documentation distinguishes automations, scripts, scenes, blueprints and helpers as five tools often used together.
| Component | What is it? | Use it when… |
|---|---|---|
| Automation | Steps started automatically by a trigger | Something should respond automatically to a change |
| Script | Saved sequence of steps without its own trigger | The same routine should be startable from multiple places |
| Scene | Saved set of states for several entities | You want to set several devices to a desired state at once |
| Blueprint | Reusable template with input fields | You want to reuse an existing automation, script or template |
| Helper | Virtual entity that stores a value, status or setting | Automations need memory or adjustable parameters |
Beginner tip. Usually start with an automation. Create a script when you want to reuse the same actions or start them manually. Use a scene for a fixed atmosphere or device state, and helpers for settings or memory.
2. Scenes: a saved state
A scene records how several devices and entities should look at a particular moment. Think Movie night: ceiling light off, accent light at 20%, blinds closed. A scene is therefore not a step-by-step plan; Home Assistant tries to apply the desired states.
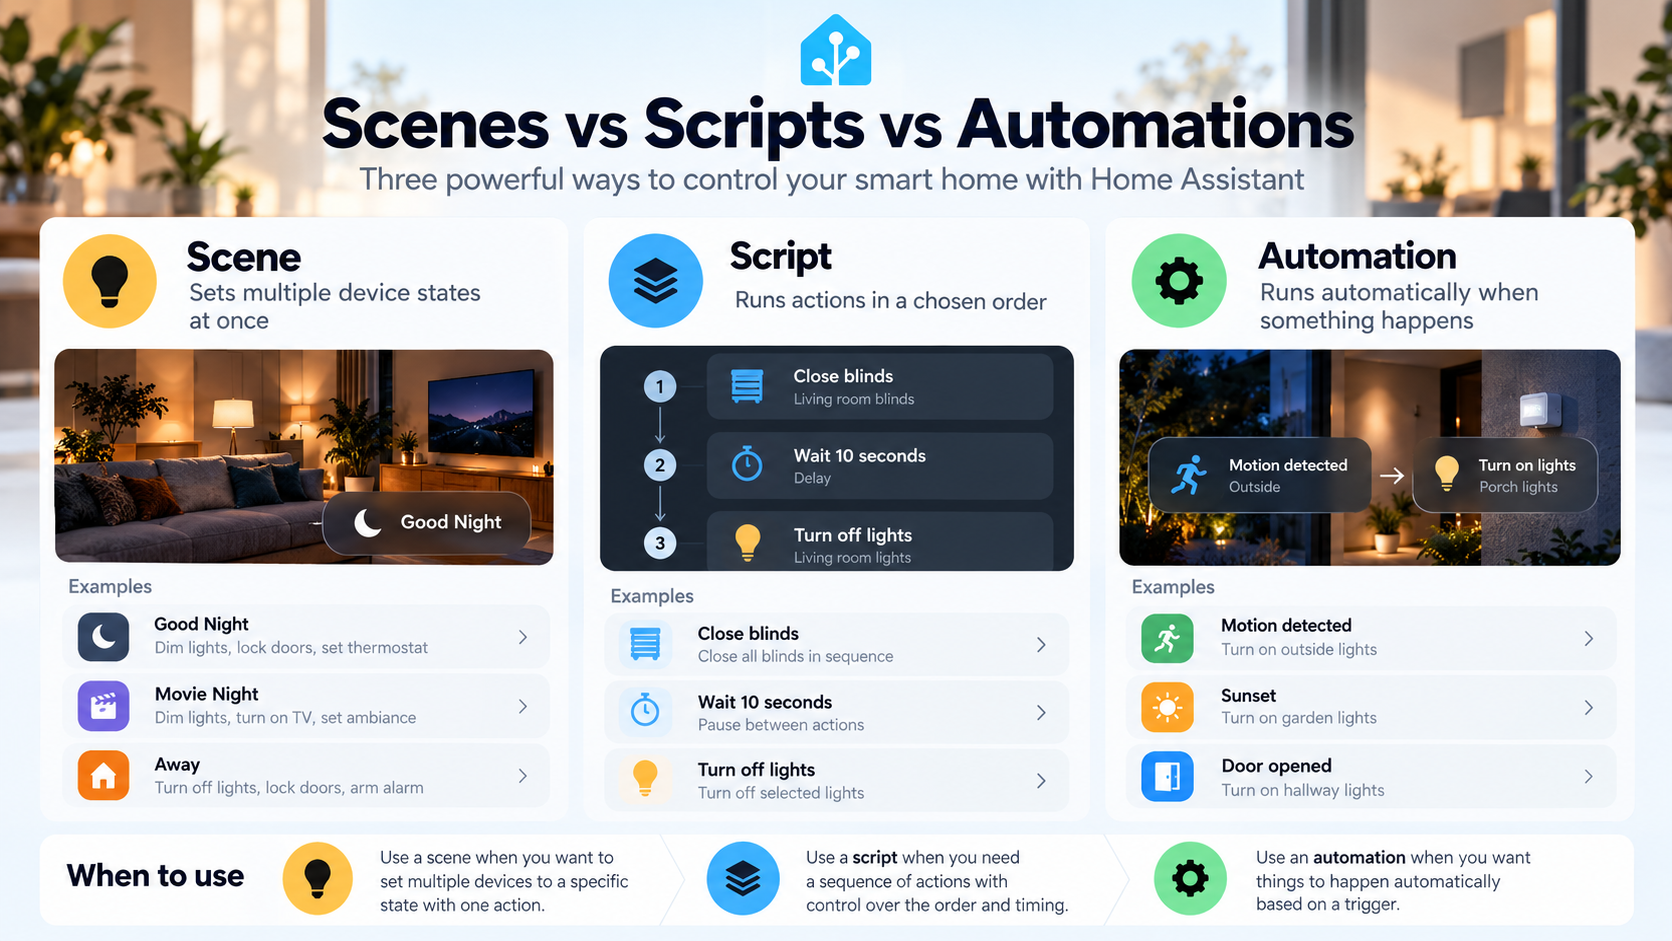
Create a scene through Settings > Automations & scenes > Scenes > Create scene. The scene editor uses Live Edit: changing the state of an added device applies that change to the actual device while you create the scene.
You can activate scenes with Activate scene. Home Assistant also supports actions to apply a set of states directly without a saved scene, create a temporary scene, delete that temporary scene again, and reload YAML scenes.
Simple scene in YAML
scene:
  - name: Movie night
    entities:
      light.woonkamer_plafond:
        state: "off"
      light.woonkamer_sfeer:
        state: "on"
        brightness: 55
      cover.woonkamer:
        state: "closed"
3. What can scenes do in 2026.10?
Activate scene is the main action for beginners. But the current Scenes integration offers more. These options become useful when you build more advanced flows.
| Feature | What it does | Typical use |
|---|---|---|
| Activate scene | Activates a saved scene | Movie night, Good night, Cleaning |
| Apply scene | Applies states directly without saving a scene first | One-off or dynamic presets |
| Create scene | Creates a temporary scene at runtime | Remember the current state for later restoration |
| Delete scene | Removes a runtime scene | Clean up a temporary snapshot |
| Reload scenes | Reloads YAML scenes | After manual YAML changes |
| Scene activated trigger | Responds when a scene is activated | Link another automation to scene use |
Useful pattern. Want to remember the current lighting, turn everything up for cleaning, then return to the previous state? A temporary scene can be very useful.
4. Scripts: a reusable sequence of steps
A script is a saved list of steps that runs only when you start it. You can start one from a dashboard, through Assist, from an automation or from another script. A script therefore has no trigger of its own.
Use a script mainly when the same routine is needed in multiple places. For example, an Arrival routine can be started by a presence automation, a dashboard button and Assist.
Script: arrival routine
alias: Arrival routine
mode: single
sequence:
  - action: light.turn_on
    target:
      entity_id: light.hal
    data:
      brightness_pct: 70
  - action: climate.set_temperature
    target:
      entity_id: climate.woonkamer
    data:
      temperature: 20.5
  - delay: "00:00:10"
  - action: media_player.turn_on
    target:
      entity_id: media_player.woonkamer
Automations and scripts use the same action building blocks, so almost everything you can put under Then do in an automation can also go in a script’s Sequence.
5. Scripts can do much more than a simple macro
Scripts in the current Home Assistant version can have input fields. In the editor, choose Menu > Add fields. A field can be an entity, number, selection list or text. That lets a script run the same routine with different values.
Script with fields
alias: Temporary lighting
mode: restart
fields:
  lamp:
    name: Light
    selector:
      entity:
        domain: light
  minutes:
    name: Minutes
    default: 5
    selector:
      number:
        min: 1
        max: 60
sequence:
  - action: light.turn_on
    target:
      entity_id: "{{ lamp }}"
  - delay:
      minutes: "{{ minutes | default(5) }}"
  - action: light.turn_off
    target:
      entity_id: "{{ lamp }}"
Scripts can also return response data to the automation or script that calls them directly. This is useful when a script first gathers information and the calling automation then uses that result.
Important difference. If you call a script directly as an action, the calling automation waits until the script finishes and can receive a response. With Turn on script (script.turn_on), the script starts in the background and the automation continues immediately.
6. Automations: WHEN → AND IF → THEN DO
An automation starts on its own. The current visual editor has a simple structure: When contains the trigger, And if the optional conditions, and Then do the actions.
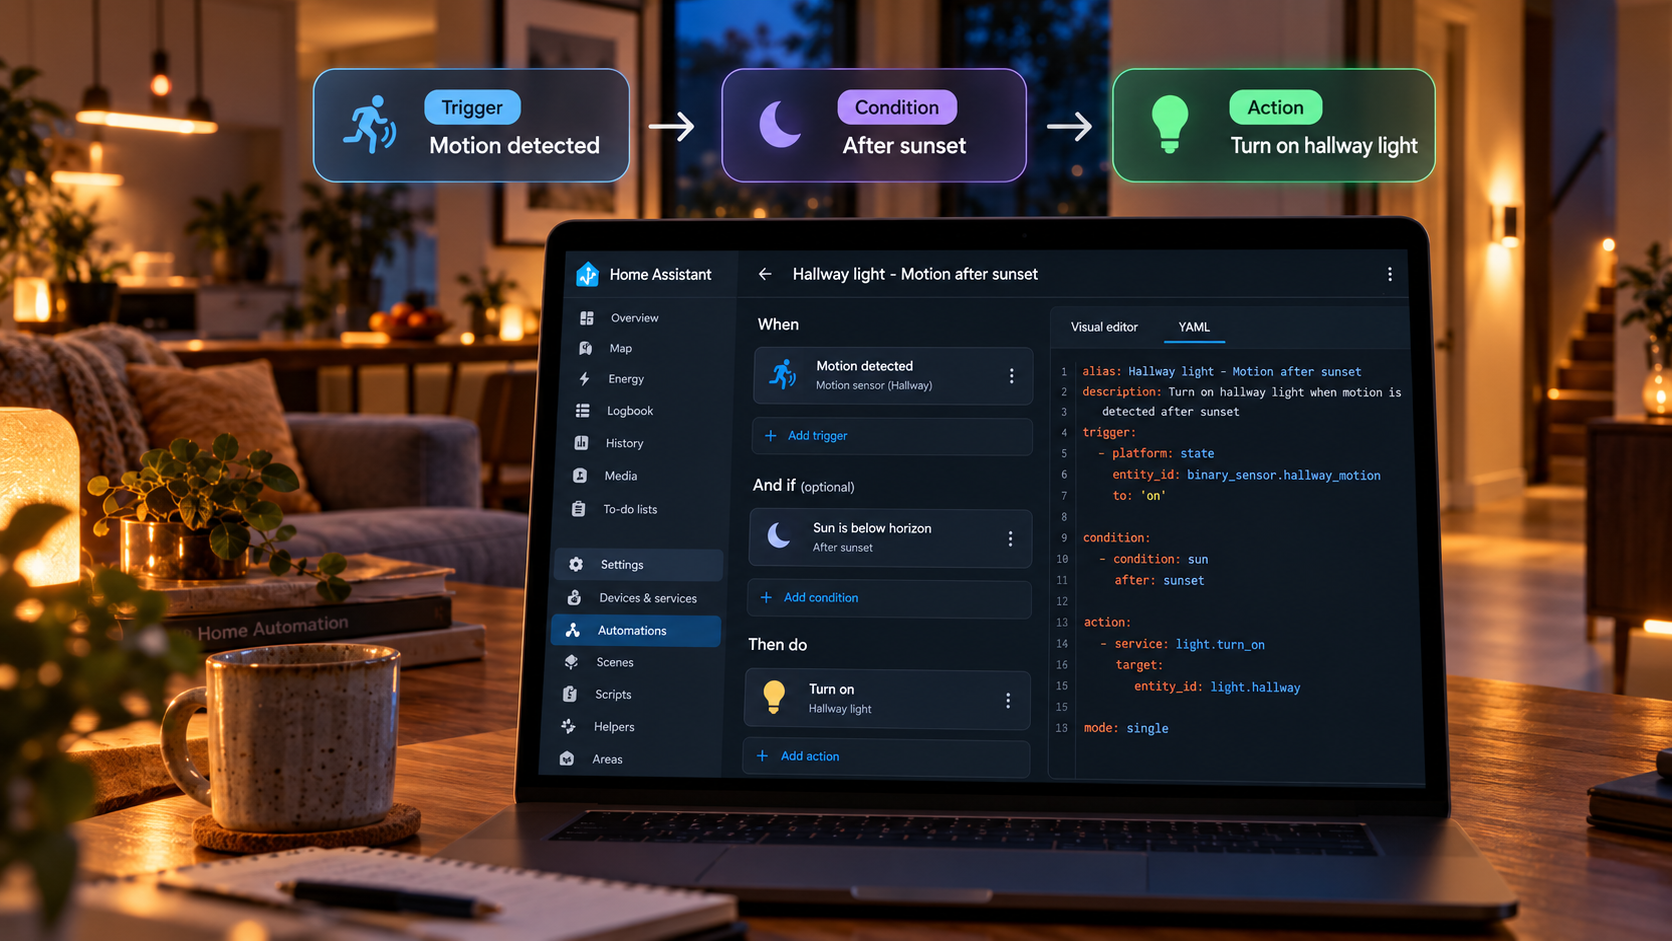
A trigger is a moment when something changes or happens. A condition starts nothing; it only checks whether something is true when the automation runs. Actions are the steps Home Assistant then executes.
Crucial distinction. A trigger responds to a transition or event, not to something remaining true over time. A door that is already open does not trigger again until it closes and then opens again.
Triggers, conditions and actions
7. Triggers: what can start an automation?
Home Assistant 2026.10 offers both device/entity-specific triggers and general triggers. Beginners are usually best served by the specific trigger offered in the editor, such as Door opened or Temperature crossed threshold. Home Assistant can, for example, compare compatible units automatically.
Important general trigger categories include:
- State changed: an entity changes state or an attribute.
- Numeric state crossed threshold: a measured value crosses a limit.
- Time and time pattern: a fixed time or repeating pattern.
- Sun: sunrise, sunset or sun elevation.
- Zone entered / Zone left: a person or tracker enters or leaves a zone.
- Tag: an NFC tag is scanned.
- Home Assistant: start or shutdown events, for example.
- MQTT: a message on a topic.
- Webhook: an HTTP call to a secret webhook URL.
- Template: a template changes from false to true.
- Manual event / events: respond to particular events.
- Sentence: respond to a custom phrase through Assist.
- Geolocation: respond to geolocation entities where relevant.
Many integrations also add their own human-friendly triggers. As a beginner, you therefore often do not need to know technical state values.
8. Multiple triggers and Triggered by – easier in 2026.10
An automation can have multiple triggers. Each trigger can start the same automation. Home Assistant 2026.10 makes it much easier to select different actions afterwards according to which trigger fired.
Add a Choose block under Then do and use a Triggered by condition. In the UI, select the relevant triggers directly. Home Assistant manages the required trigger IDs behind the scenes. YAML users can still set an id themselves.
YAML concept: different actions for each trigger
alias: Hallway motion and clear
triggers:
  - trigger: state
    entity_id: binary_sensor.hal_beweging
    to: "on"
    id: motion
  - trigger: state
    entity_id: binary_sensor.hal_beweging
    to: "off"
    for: "00:03:00"
    id: clear
actions:
  - choose:
      - conditions: "{{ trigger.id == 'motion' }}"
        sequence:
          - action: light.turn_on
            target:
              entity_id: light.hal
      - conditions: "{{ trigger.id == 'clear' }}"
        sequence:
          - action: light.turn_off
            target:
              entity_id: light.hal
In the visual editor you usually do not have to write these IDs yourself: select the trigger in the Triggered by condition.
9. Conditions: when may an automation continue?
Top-level conditions appear under And if. If one of them is false, the actions do not run. Conditions can also appear within a sequence; if such a condition fails, the rest of that sequence stops.
Common condition types for beginners:
- State: for example, a person is home, an input_boolean is on, a door is closed.
- Numeric state: temperature above or below a limit.
- Time: only between certain times or on certain days.
- Sun: before or after sunrise/sunset.
- Triggered by: execute only the path belonging to a particular trigger.
- Template: custom Jinja logic when standard conditions are insufficient.
- AND / OR / NOT: combine conditions logically.
- Integration-specific conditions: an alarm or Z-Wave state, for example, when the integration offers it.
Trigger versus condition. Use the trigger for the moment when the automation should start. Use the condition for the situation that must be true at that moment.
10. Actions and targets: what should Home Assistant do?
An action does something: turn on a light, set a thermostat, activate a scene, start a script, send a notification, control media, change a helper, fetch calendar data and so on. The current Home Assistant catalogue includes actions from almost all integrations.
An action usually has three concepts:
| Component | Meaning | Example |
|---|---|---|
| Action | Which command? | light.turn_on |
| Target | Which entity/device/area? | light.woonkamer or the living-room area |
| Data/options | Which settings? | brightness_pct: 40 |
Simple action with an area target
actions:
  - action: light.turn_on
    target:
      area_id: woonkamer
    data:
      brightness_pct: 40
Some actions return response data. For example, calendar.get_events can return appointments in a response variable, which you can use in a template in a later step.
Building blocks and run modes
11. Building blocks: the real power of scripts and automations
Home Assistant calls the logical steps between ordinary actions building blocks. Automations and scripts use the same blocks. They determine whether, when and in what order steps run.
| Building block | Purpose | Example |
|---|---|---|
| Condition | Stop or continue only if something is true | Continue only if nobody is home |
| Delay | Wait a fixed time | Wait 5 minutes |
| Wait for trigger | Wait for an event | Wait until the door closes |
| Wait template | Wait until a template becomes true | Wait until power < 3 W |
| Choose | Select the first matching route | Day / evening / night |
| Repeat count | Repeat N times | Flash a lamp 3 times |
| Repeat while | Repeat while a condition is true | Keep trying while offline |
| Repeat until | Repeat until a condition becomes true | Try until a device turns on |
| Repeat for each | Iterate over a list | Handle several lights one by one |
| Parallel | Run groups at the same time | Start lights and media together |
| Stop | Stop the sequence; optionally return a response/error | Finish a script and return its result |
12. Delay, wait and restart behavior
Delay is simple: it pauses the sequence for a fixed time. Wait for trigger waits for a new event. Wait template waits until a template becomes true. With waits you can set a timeout and then decide whether the sequence should continue.
An important beginner detail: restarting Home Assistant stops automations and scripts that are currently in a delay or wait. For critical scheduling, prefer helpers, timers or timestamps that can be evaluated again after a restart.
Classic motion timer with restart mode
actions:
  - action: light.turn_on
    target:
      entity_id: light.hal
  - delay:
      minutes: 5
  - action: light.turn_off
    target:
      entity_id: light.hal
mode: restart
With mode: restart, every new trigger starts the run from the beginning, so the five minutes are counted again from the last motion.
13. Choose, repeat and parallel – when should you use them?
Choose is like if/elif/else. Home Assistant executes only the first option whose conditions all match; if none match, a default route can run. Repeat has several forms: a fixed number of times, while something is true, until something becomes true, or for each item in a list.
Parallel is useful when independent groups of steps may begin at the same time. Do not use it thoughtlessly for the same device, because two parallel routes can contradict one another.
Choose: night or normal
actions:
  - choose:
      - conditions:
          - condition: state
            entity_id: input_select.house_mode
            state: Night
        sequence:
          - action: light.turn_on
            target:
              entity_id: light.hal
            data:
              brightness_pct: 10
    default:
      - action: light.turn_on
        target:
          entity_id: light.hal
        data:
          brightness_pct: 70
14. Run modes: single, restart, queued and parallel
The mode determines what Home Assistant does when an automation or script is started again while its previous run is still in progress. This becomes essential as soon as you use delays, waits or long routines.
| Mode | Behavior | Good example |
|---|---|---|
| Single | Does not start a new run; issues a warning | A routine that must never run twice |
| Restart | Stops the previous run and starts a new one | Motion light with an off timer |
| Queued | New runs wait in order | Commands that must be processed in sequence |
| Parallel | Starts a new independent run alongside the existing one | Independent notifications or tasks |
For queued and parallel you can also set limits for the number of simultaneous or queued runs.
Beginner rule. If you do not know which mode you need, start with single. Use restart deliberately for timers that must begin again. Use queued or parallel only when you understand why.
Working together and reusing logic
15. How scenes, scripts and automations work together
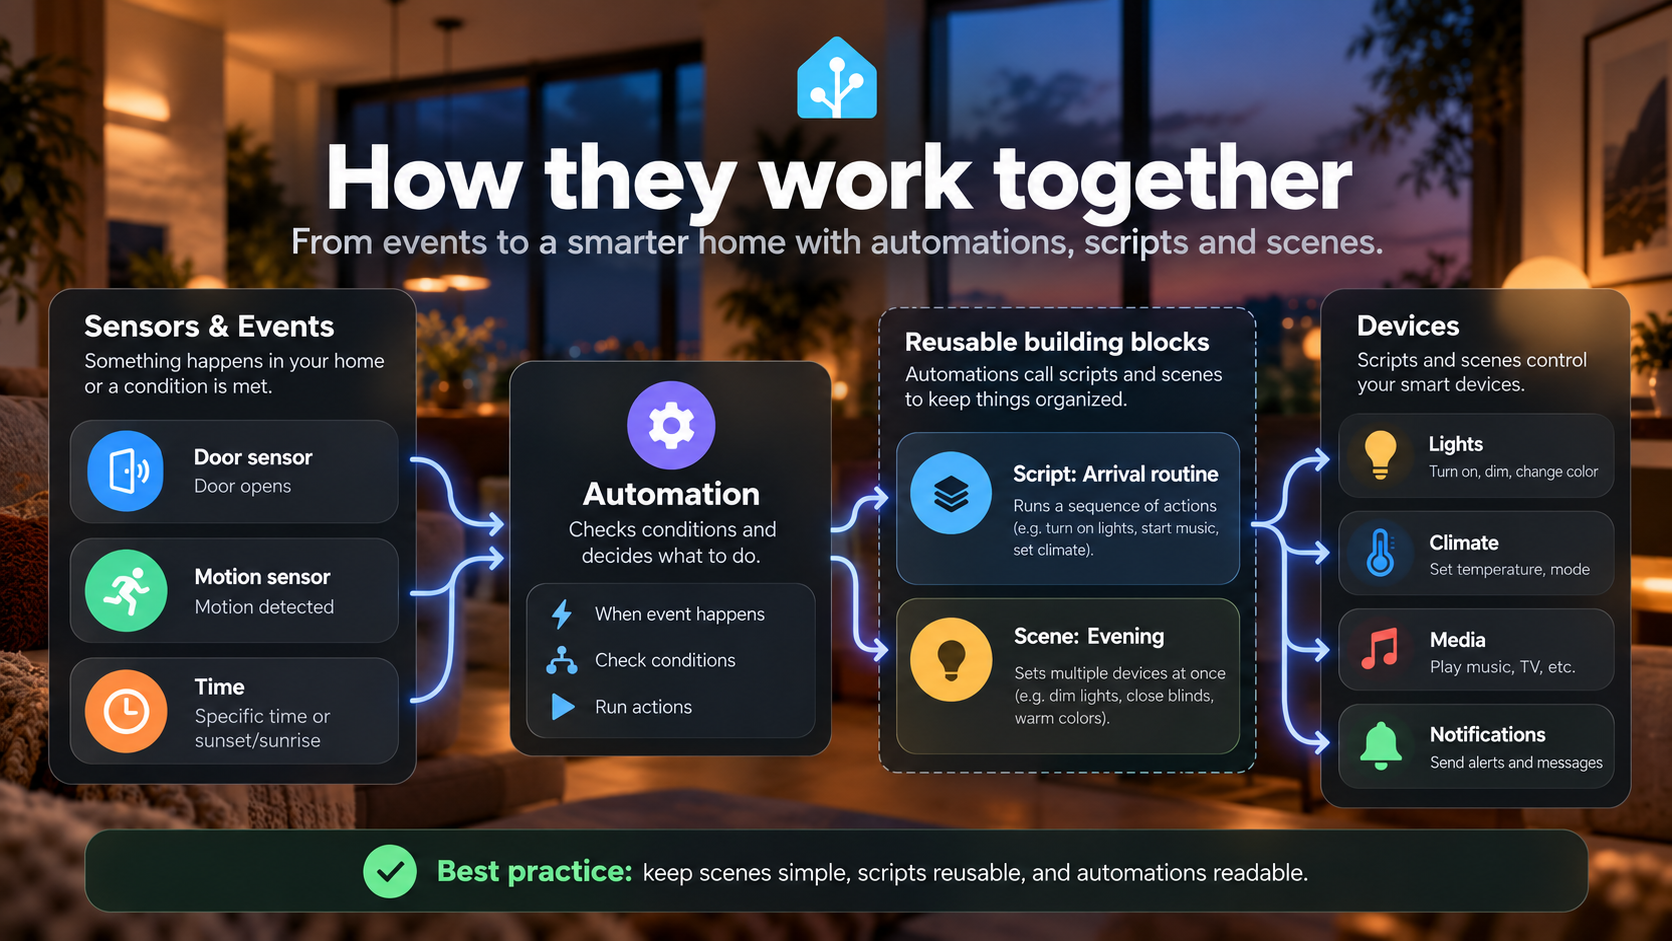
A maintainable structure does not have to be complicated. The automation decides when something happens and under which conditions. The script contains a reusable routine. A scene sets devices to a fixed final state.
A short automation that reuses existing building blocks
alias: Coming home after sunset
triggers:
  - trigger: state
    entity_id: person.dennis
    to: "home"
conditions:
  - condition: sun
    after: sunset
actions:
  - action: script.arrival_routine
  - action: scene.turn_on
    target:
      entity_id: scene.evening_downstairs
mode: single
16. Calling a script: wait or continue immediately?
The current Home Assistant documentation clearly distinguishes two ways to start a script.
| Method | What happens? | Use it when… |
|---|---|---|
| The script itself as an action | Automation waits until it finishes; response possible | Later steps depend on the script |
| Turn on script | Script starts in the background; automation continues immediately | Routines may run independently |
Two ways to start scripts
actions:
  # Wait for completion
  - action: script.arrival_routine
  # Start in background and continue immediately
  - action: script.turn_on
    target:
      entity_id: script.muziek_routine
This distinction is especially important with longer scripts, error handling and response data.
17. Small features that make a big difference
The editor and building blocks include several features that beginners often discover only later:
- Rename / alias: give each step a clear name. It also appears in traces.
- Disable: temporarily turn off triggers, conditions and actions without deleting them.
- Continue on error: let subsequent steps continue when a non-critical action fails. This does not ignore configuration errors.
- Variables: temporarily store values for templates and later actions.
- Response variable: save data returned by an action.
- Set conversation response: let an automation started by Assist provide a custom spoken or text response.
Home Assistant 2026.10 also shows more important details directly on editor rows, such as thresholds, for durations, sun offsets and wait timeouts. You therefore need to open each row less often.
18. Blueprints: reuse without building everything yourself
A blueprint is a reusable template for an automation, script or template entity. Its author leaves some parts open as inputs; you select your own motion sensor, lamp and timeout, for example.
Blueprints are interesting for beginners because you can use a well-designed automation without writing all the YAML yourself. You can reuse one blueprint with different devices.
Go to Settings > Automations & scenes > Blueprints. Blueprints can be imported from GitHub, GitHub Gists and the Home Assistant Community, among other sources.
Important. A blueprint is not a standalone running automation. You create your own automation from it, using your chosen inputs. Blueprint updates take effect when automations are reloaded.
Testing and practical examples
19. Test one thing at a time
The best way to learn Home Assistant is to test components separately. Test an action first, then a script or scene, and only then the full trigger logic.
A practical sequence:
- Can Home Assistant control the device manually?
- Does the isolated action work from the editor or Settings > Tools > Actions?
- Does the scene or script work manually?
- Does the trigger respond when you reproduce the real event?
- Are all conditions true when the trigger fires?
- Does the selected run mode make sense?
In the automation editor, you can duplicate, copy, cut, paste, rearrange and temporarily disable rows. That makes experimentation safer than repeatedly deleting configuration.
20. Traces: your main troubleshooting tool
Each automation run can produce a trace. It shows which trigger started it, which conditions were checked, which Choose route was taken and where the run stopped or failed.
Home Assistant 2026.10 visually redesigned traces to align them more closely with the automation editor. When an automation "does nothing", the trace is usually the first place to look.
Caution when using Run actions. Manually running only an automation’s actions does not automatically test the real trigger or top-level conditions. Always simulate the real situation for the final test.
21. Six practical examples for beginners
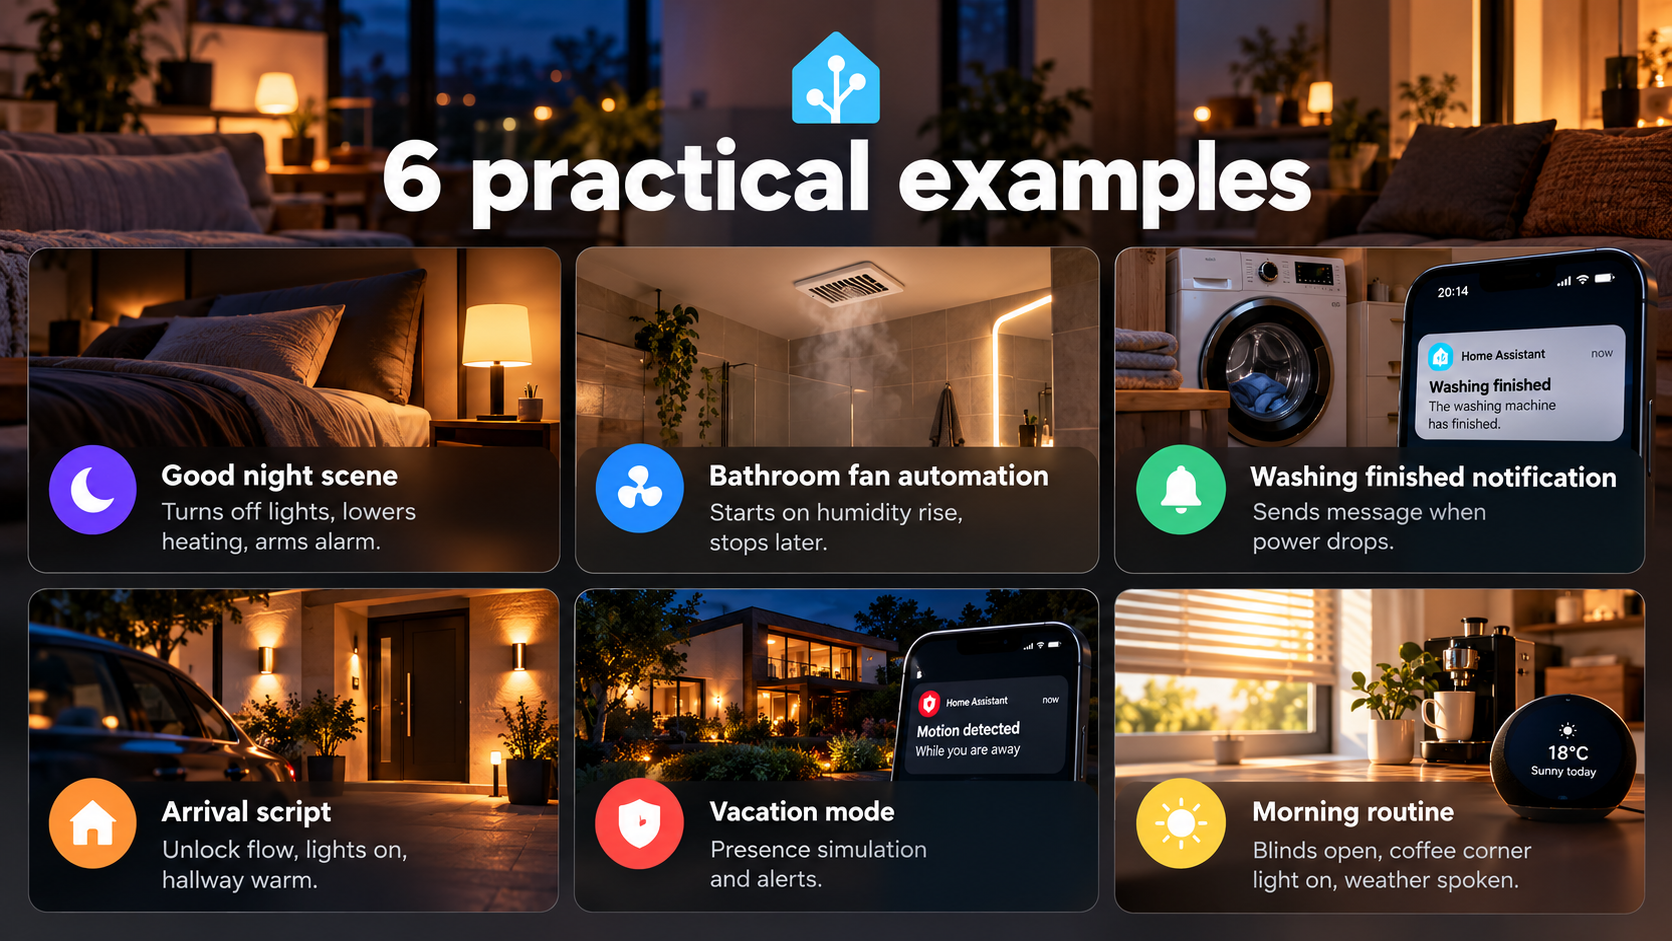
The examples below show which tools usually fit best.
| Scenario | Best foundation | Why |
|---|---|---|
| Good night | Scene + script + automation | Scene for states; script for routine; automation for automatic start |
| Bathroom fan | Automation / possibly script | Sensor trigger and run-on time |
| Washing machine finished | Automation + helper | Detect power and notify only once |
| Arrival routine | Script + automation | Reuse routine from presence/dashboard/Assist |
| Vacation mode | Helper + automations + scenes | Central house state controls several flows |
| Morning routine | Script + automation | Several steps, possibly based on time/presence |
22. Practical example: hallway light after the last motion
This is a perfect beginner example for restart mode. The automation starts on motion, turns the light on, waits five minutes and turns it off. Every new motion restarts the run, so the timer begins again.
Simple but robust motion automation
alias: Hallway - motion lighting
mode: restart
triggers:
  - trigger: state
    entity_id: binary_sensor.hal_beweging
    to: "on"
actions:
  - action: light.turn_on
    target:
      entity_id: light.hal
  - delay:
      minutes: 5
  - action: light.turn_off
    target:
      entity_id: light.hal
In the current UI you can often select a specific Motion detected trigger instead of a general State changed trigger. The specific trigger is usually clearer for beginners.
23. Practical example: bathroom fan without unnecessary complexity
For a first version, a numeric threshold may be enough. Later you can extend this with hysteresis, relative rise, absolute humidity or your own template sensor.
Beginner bathroom ventilation
alias: Bathroom - high humidity
mode: restart
triggers:
  - trigger: numeric_state
    entity_id: sensor.badkamer_luchtvochtigheid
    above: 70
actions:
  - action: switch.turn_on
    target:
      entity_id: switch.badkamer_ventilatie
  - delay:
      minutes: 20
  - action: switch.turn_off
    target:
      entity_id: switch.badkamer_ventilatie
Why restart? If the automation triggers again during its run-on time, that run-on time starts over. For a truly good shower automation, you can later examine humidity trends or the difference from a reference sensor.
24. Practical example: washing machine finished
A smart plug with power measurement can infer an appliance state. Since a washing machine may also use a little power while idle, a helper is useful for remembering whether a cycle was actually running.
Power detection + helper
alias: Washing machine - finished
mode: single
triggers:
  - trigger: numeric_state
    entity_id: sensor.wasmachine_power
    below: 3
    for: "00:03:00"
conditions:
  - condition: state
    entity_id: input_boolean.washing_running
    state: "on"
actions:
  - action: notify.mobile_app_telefoon
    data:
      title: Washing machine
      message: The washing machine has finished.
  - action: input_boolean.turn_off
    target:
      entity_id: input_boolean.washing_running
Adjust the exact power threshold and time to your appliance. Use History to inspect its real power profile.
25. Practical example: temporary scene for restoring state
Sometimes you want to change the state of devices temporarily and then return. For example, turn every living-room light fully on for an alarm test, then restore the original lighting.
The Scenes integration can create a scene from current states at runtime. You then apply other states. When you finish, activate the temporary scene to return. This is more advanced than a standard scene but very powerful.
For beginners. Start with ordinary scenes. Use runtime scenes only when you deliberately need a "snapshot and restore" pattern.
Reliability and reference
26. Reliability: for, delays and Home Assistant restarts
A common mistake is assuming every waiting period survives a restart. It does not. A Home Assistant restart interrupts an active delay or wait. for periods on state/numeric triggers are not simply continued from the old runtime context after a restart either.
For actions that absolutely must happen later, helpers such as Timer or Date/time can be a better foundation. After a restart, you can then reassess the desired state and schedule.
Design principle. Use delay mainly for short, non-critical waits. For important scheduling over hours or days, save a time/status in a helper and make your automation recoverable.
27. Advanced triggers beginners should still know about
You do not need to use them immediately, but Home Assistant can do much more than time and sensor states.
- Webhook: an external system can start an automation over HTTP. Keep the webhook ID secret; leave
local_onlyon when internet access is not needed. - MQTT: start on a message or payload from an MQTT topic.
- Sentence: let Assist respond to a custom phrase.
- Tag: start a flow with NFC tags.
- Event: respond to Home Assistant events.
- Zone: people/trackers enter or leave a location.
- Template: create a custom calculated trigger when standard types are insufficient.
Use external webhook triggers very cautiously for safety-critical actions, such as unlocking a door or opening a garage door.
28. Best practices for beginners
- First write the logic in plain language. For example: "If motion is detected and it is dark, turn on the hallway light for five minutes."
- Use specific triggers when the editor offers them; they are often clearer than raw states.
- Give automations, scripts and scenes descriptive names.
- Give important steps an alias or name. This makes traces much easier to read.
- Avoid duplication. If the same sequence of actions recurs, create a script.
- Use scenes for states, not for timing or decisions.
- Choose a mode deliberately, especially when delays/waits are involved.
- Test each component separately.
- Use helpers for memory and adjustable values.
- Make critical automations recoverable after a restart.
29. Common mistakes
| Mistake | Consequence | Better approach |
|---|---|---|
| Everything in one huge automation | Difficult to read and debug | Split reusable routines into scripts |
| Scene as a step-by-step plan | No control over order/waits | Use a script |
| Script for every tiny command | Unnecessary abstraction | Keep a simple action in the automation |
| Single mode with timer | New motion does not reset the timer | Use restart mode where appropriate |
| Test only Run actions | Trigger/conditions remain untested | Simulate the real event and examine the trace |
| Long critical delay | Disappears on restart | Store scheduling in a helper/timestamp |
| No helper for appliance status | Duplicate alerts or incorrect status | Store a virtual state |
| Share a webhook ID | Security risk | Use a unique secret ID and local_only where possible |
30. GUI or YAML?
For beginners, the visual editor is the best starting point. Home Assistant 2026.10 displays triggers, conditions and actions more clearly and can manage the underlying trigger IDs for Triggered by.
YAML remains valuable for:
- complex templates;
- copying and sharing examples quickly;
- keeping configuration under version control;
- advanced variables and templated values;
- understanding what the editor stores behind the scenes.
A useful recent feature: in many cases you can copy YAML snippets from the official documentation directly into the visual editor, and Home Assistant converts them to the editor structure.
Advice. Learn the logic through the GUI first. Then use YAML as a tool, not an entry requirement.
31. Which tool should you use when?
| Question | Use |
|---|---|
| Should something start automatically when a value changes? | Automation |
| Should I be able to start the same steps both manually and automatically? | Script |
| Should I set several devices to fixed states at once? | Scene |
| Should I reuse an existing generic solution? | Blueprint |
| Should Home Assistant remember a state/choice/number? | Helper |
| Should an automation choose different routes? | Choose + conditions / Triggered by |
| Should a sequence restart on new activity? | Mode Restart |
| Should events be processed in order? | Mode Queued |
| May independent runs execute together? | Mode Parallel |
The simple memory aid still works: Scene = state | Script = routine | Automation = decision. Thinking from these three ideas makes Home Assistant much easier to understand. Blueprints and helpers add to that core as your setup grows.
32. Conclusion
Scenes, scripts and automations are not three competing ways of doing the same thing. They complement each other. A scene records how devices should be set. A script stores a reusable sequence of steps. An automation decides when and under which conditions those steps should run.
Home Assistant 2026.10 makes the visual automation experience easier to access again, particularly by integrating Triggered by and trigger IDs more effectively into the UI. Beginners can therefore build increasingly powerful logic without having to write YAML immediately.
Start small: a motion-light automation, a Movie night scene and a simple Arrival routine script. Once those three work well, you understand the core. Then gradually add helpers, fields, choose, waits, repeat, response data and blueprints.
Version: Home Assistant 2026.10.2 – checked on 22 October 2026.
Sources and version check
This guide is based on the official Home Assistant documentation and the 2026.10 release notes. The principal pages consulted are:
- https://www.home-assistant.io/blog/2026/10/07/release-202610/
- https://www.home-assistant.io/docs/automation/
- https://www.home-assistant.io/docs/automation/trigger/
- https://www.home-assistant.io/docs/automation/action/
- https://www.home-assistant.io/docs/automation/building-blocks/
- https://www.home-assistant.io/docs/automation/editor/
- https://www.home-assistant.io/docs/script/
- https://www.home-assistant.io/integrations/scene/
- https://www.home-assistant.io/docs/scene/
- https://www.home-assistant.io/docs/automation/which-tool-to-use/
- https://www.home-assistant.io/docs/automation/using_blueprints/
Home Assistant documentation changes with new releases. Before leaving this article published for a longer period, it is worth briefly rechecking screenshots and terminology after major monthly releases.