
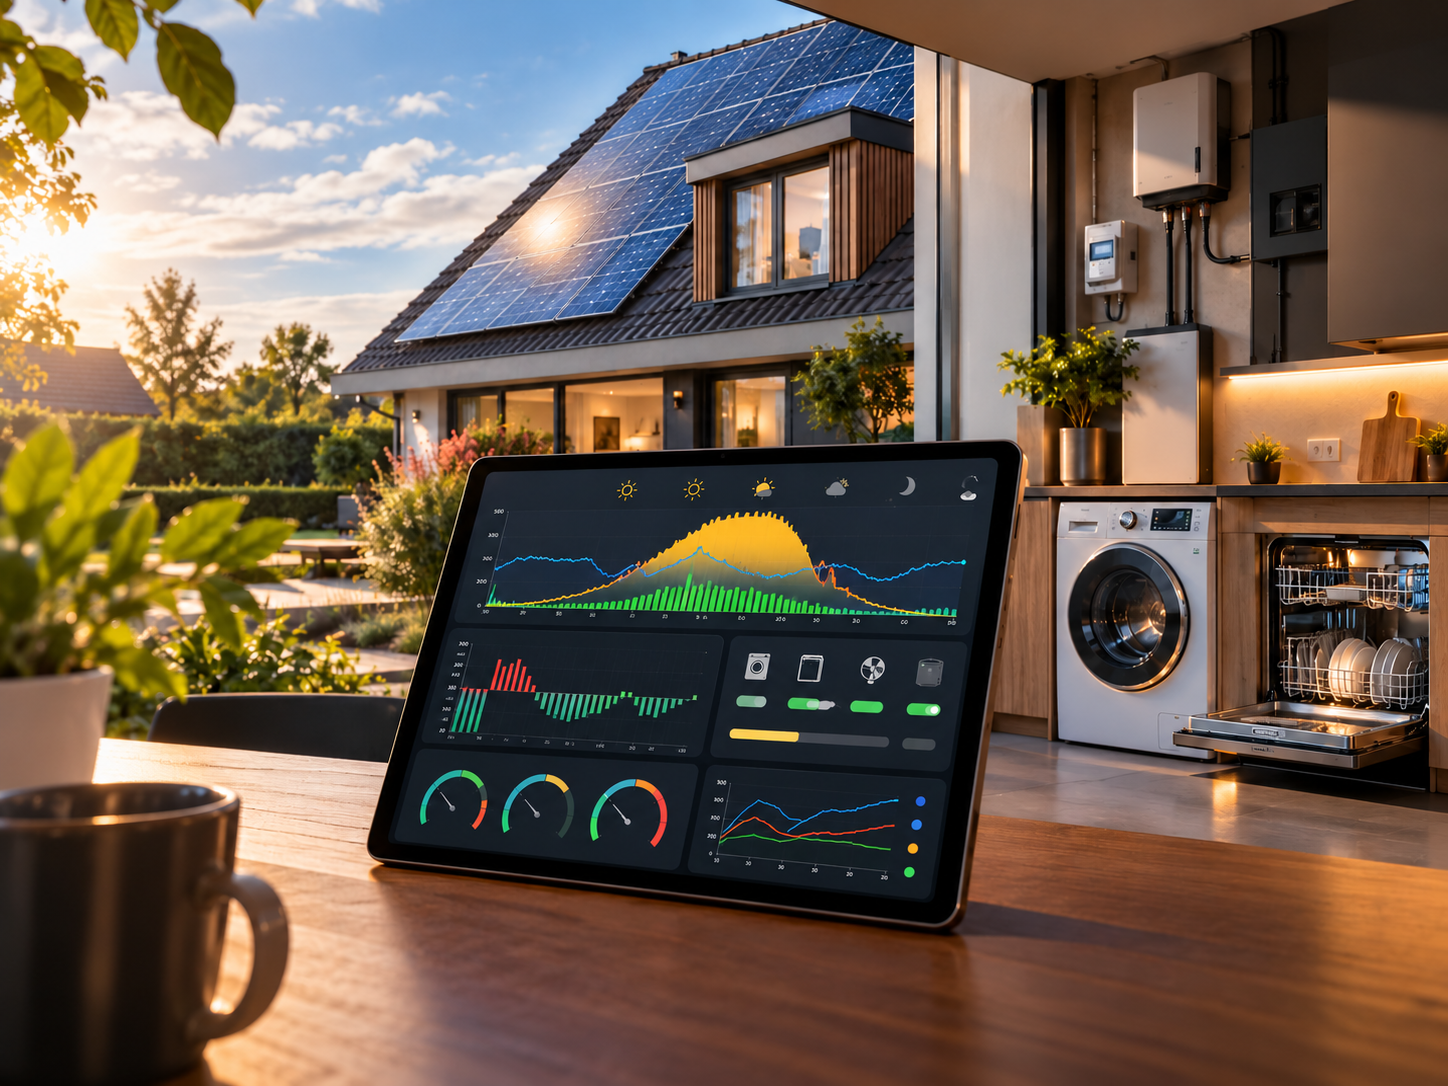
PV Energy Suite for Home Assistant helps you forecast solar production, plan electricity use, manage negative prices and monitor phase loads. This complete guide covers PV Grid Forecast, Self-Consumption Planner, Phase Peak Guard and the PV switching blueprint.
Related software: see PV Energy Suite under Software for the short repository introduction and GitHub link.
What this suite is for
PV Energy Suite brings together four separate functions without unnecessarily binding them together. Only the PV blueprint may operate the PV switch. Forecast, planner and Phase Guard analyse and advise.
This guide is based on the current repository and README, checked again on 5 October 2026. The README really has changed since the earlier review; its new quick start and device configuration are incorporated below.
1. The README has changed – and installation is clearer
Yes: the README has been updated since my earlier review. The underlying architecture is unchanged, but the entry path is clearer. The current README opens with an explicit Start here section and recommends PV Grid Forecast with the integrated planner for a first test.
The most important clarifications are:
- Work from your existing AppDaemon
apps.yaml; do not overwrite it. - For the integrated planner, copy both
pv_grid_forecast.pyandpv_self_consumption.py, and setplanner_enabled: true. - Choose deliberately between fixed YAML values and Home Assistant helpers for device profiles.
- The README now explains much more explicitly which source entities you must supply and which MQTT entities the suite creates itself.
- The warning never to run the integrated and standalone planners together is more prominent and more specific.
Important for this article: the installation sections below follow the newer README structure, not the older version.
This guide covers the suite, its four parts, data sources, PV switching, PV Grid Forecast, Self-Consumption Planner, the integrated-versus-standalone choice, Phase Peak Guard, installation, helpers and dashboards, an example day, and limitations, safety and maintenance.
2. One suite, but deliberately four independent parts
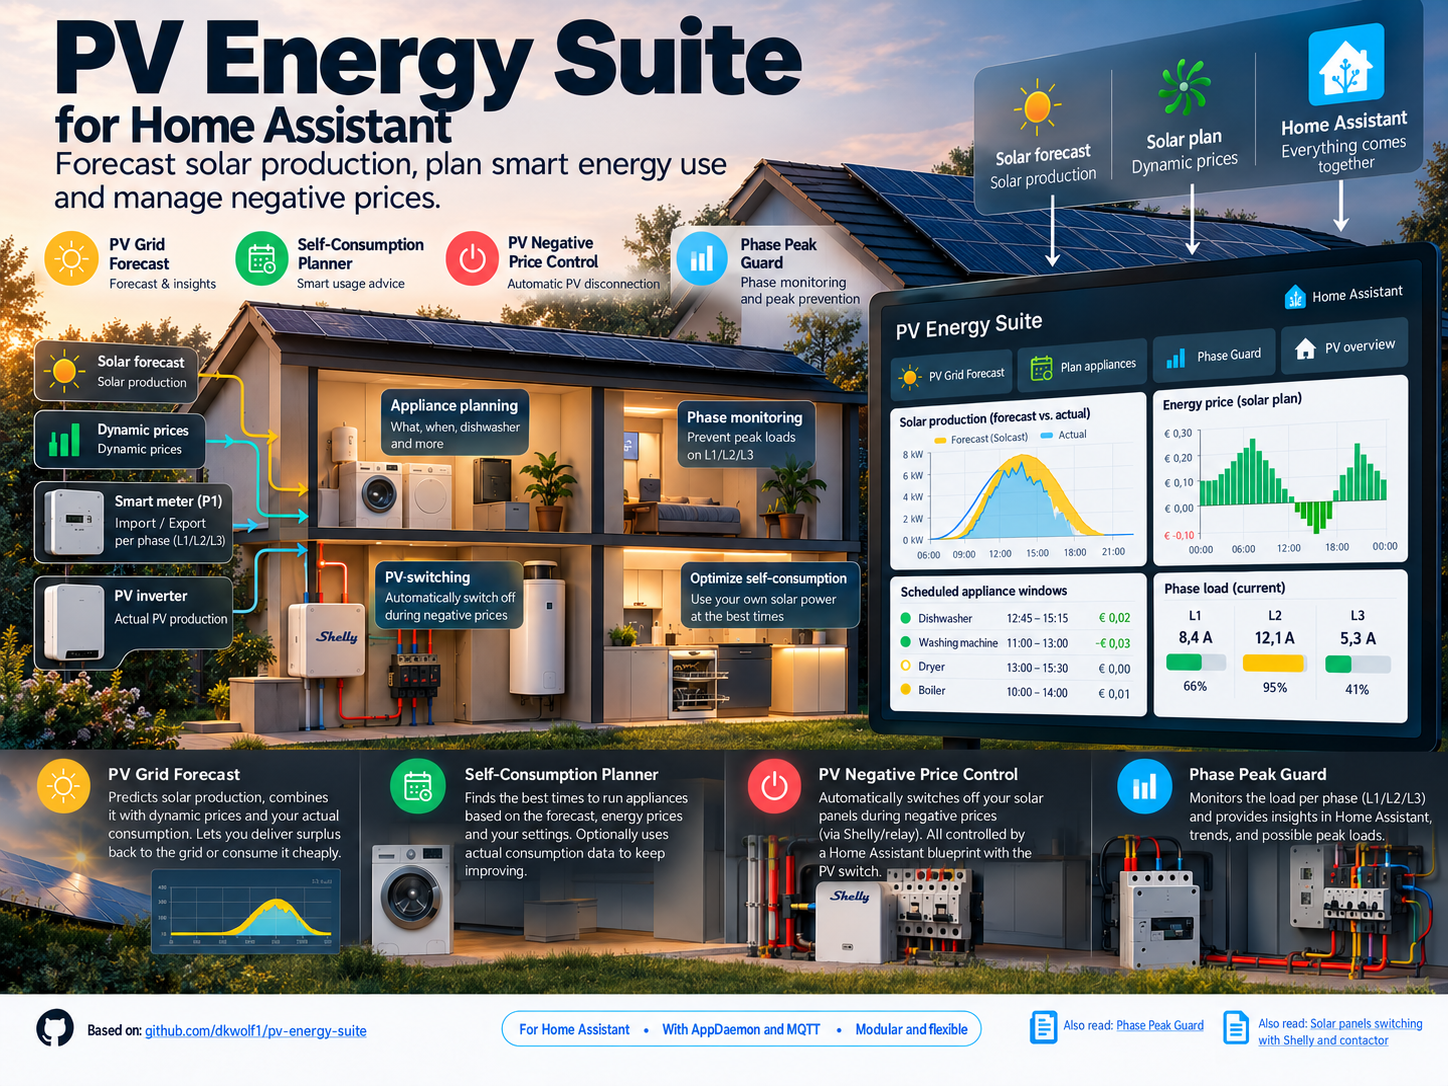
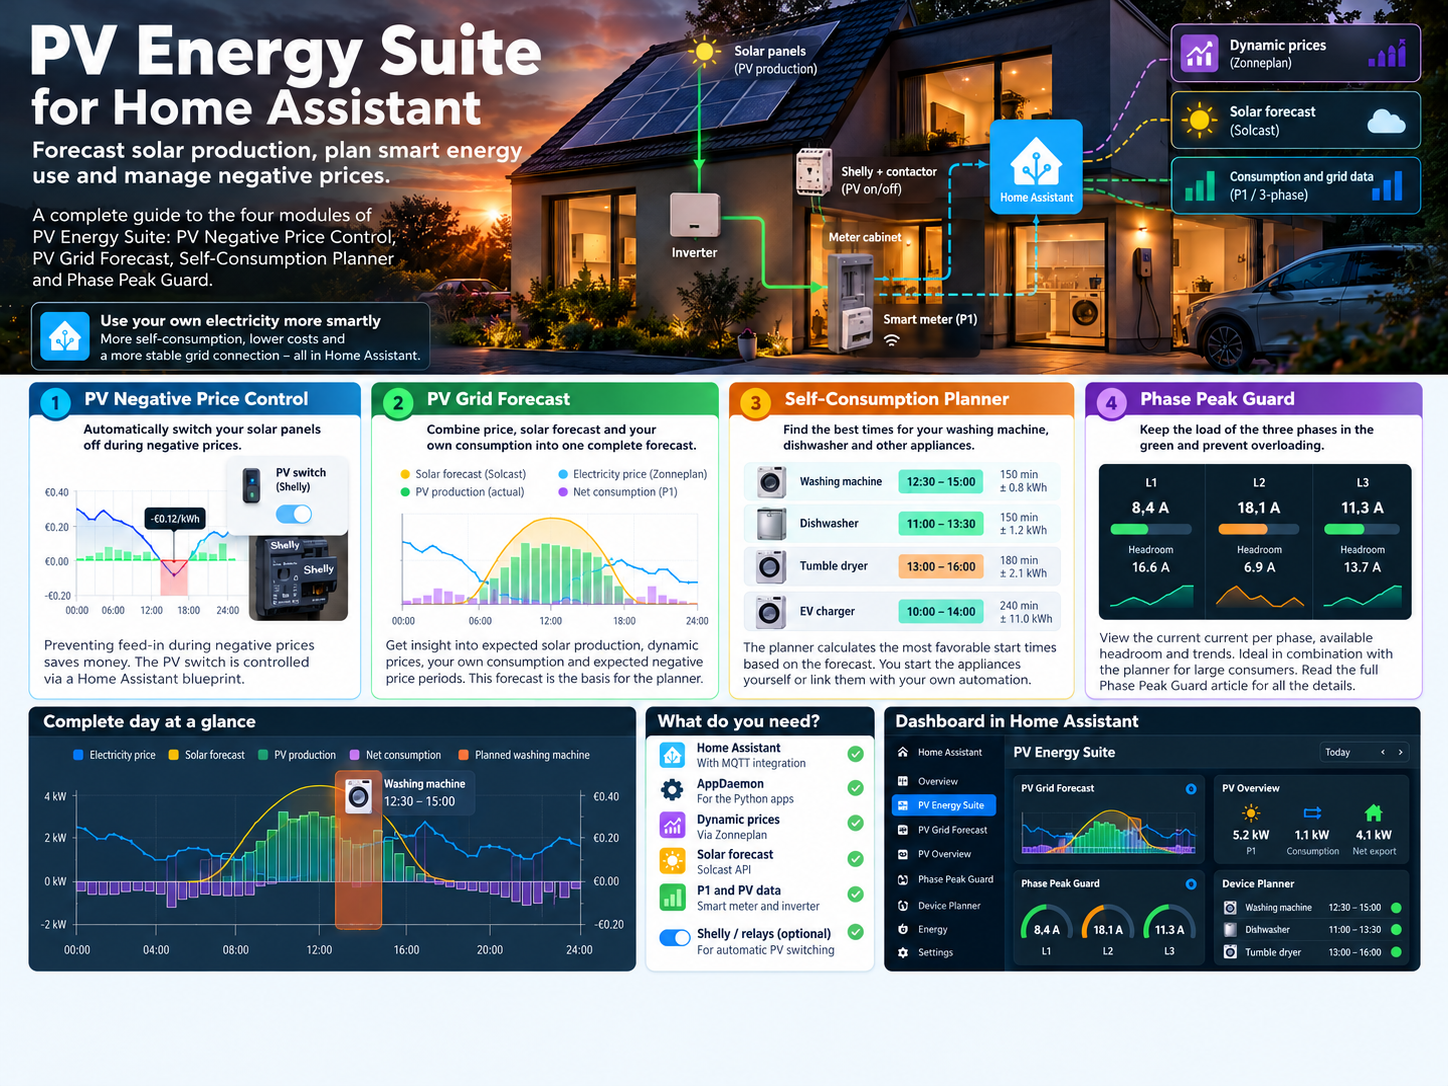
PV Energy Suite is not one large monolithic automation. The repository bundles four components that can run independently. This matters: you can start small and extend the system later without needing the entire architecture immediately.
The division is clear. The blueprint switches. The forecast predicts. The planner advises. Phase Guard monitors. That makes responsibility clear when something happens.
Strong design principle: the PV blueprint is the sole writer to the Shelly/PV switch. Forecast and planner read the same threshold and blocking helpers so their predictions reflect the same reality, but they do not control the hardware themselves.
3. What data enters the suite?
The suite does not generate its source data. It combines existing Home Assistant entities from price, solar, inverter and smart-meter integrations. The current README emphasises this very clearly.
| Source | Used by | Expected form |
|---|---|---|
| Zonneplan quarter-hour prices | Forecast + planner | forecast attribute with quarter-hour prices |
| Solcast today/tomorrow | Forecast + planner | detailedForecast attribute |
| Current PV power from ECU/inverter | Forecast + planner | W |
| P1 grid import and export | Forecast + planner | kW |
| Threshold + automatic + manual blocking | Curtailment forecast + blueprint | Home Assistant helpers |
| Three phase sources | Phase Guard | Preferably current in A |
Units are not a minor detail. The repository expects ECU PV power in watts, P1 import/export in kilowatts and Solcast detailedForecast in kilowatts. Incorrect units can produce results that look convincing but are factually wrong.
MQTT Discovery
The forecast, planner and Phase Guard publish their results through MQTT Discovery. You therefore do not have to create sensors such as sensor.pv_*, sensor.pv_planner_* and sensor.phase_guard_* yourself as helpers.
4. PV Negative Price Control – the only part that actually switches
The blueprint compares the current electricity price with an adjustable threshold. If the price is less than or equal to that threshold, the PV installation can be switched off. When the price rises above the threshold again, PV can be switched back on.
The blueprint supports inverted switching logic. This matters when a contactor is wired so that switch on means PV is actually off. The README therefore rightly warns you to check inverted_switch against the physical installation.
There are also helpers for automatic control, manual blocking, the last switching moment and minimum switching time. The blueprint supports an optional temperature sensor as well.
Also read the hardware article: for the electrical side – Shelly, contactor, fail-safe behaviour and physical wiring – I deliberately refer to the existing MechScript article Switching off solar panels with Shelly and a contactor. This guide stays focused on software.
5. PV Grid Forecast – from separate sensors to one energy picture
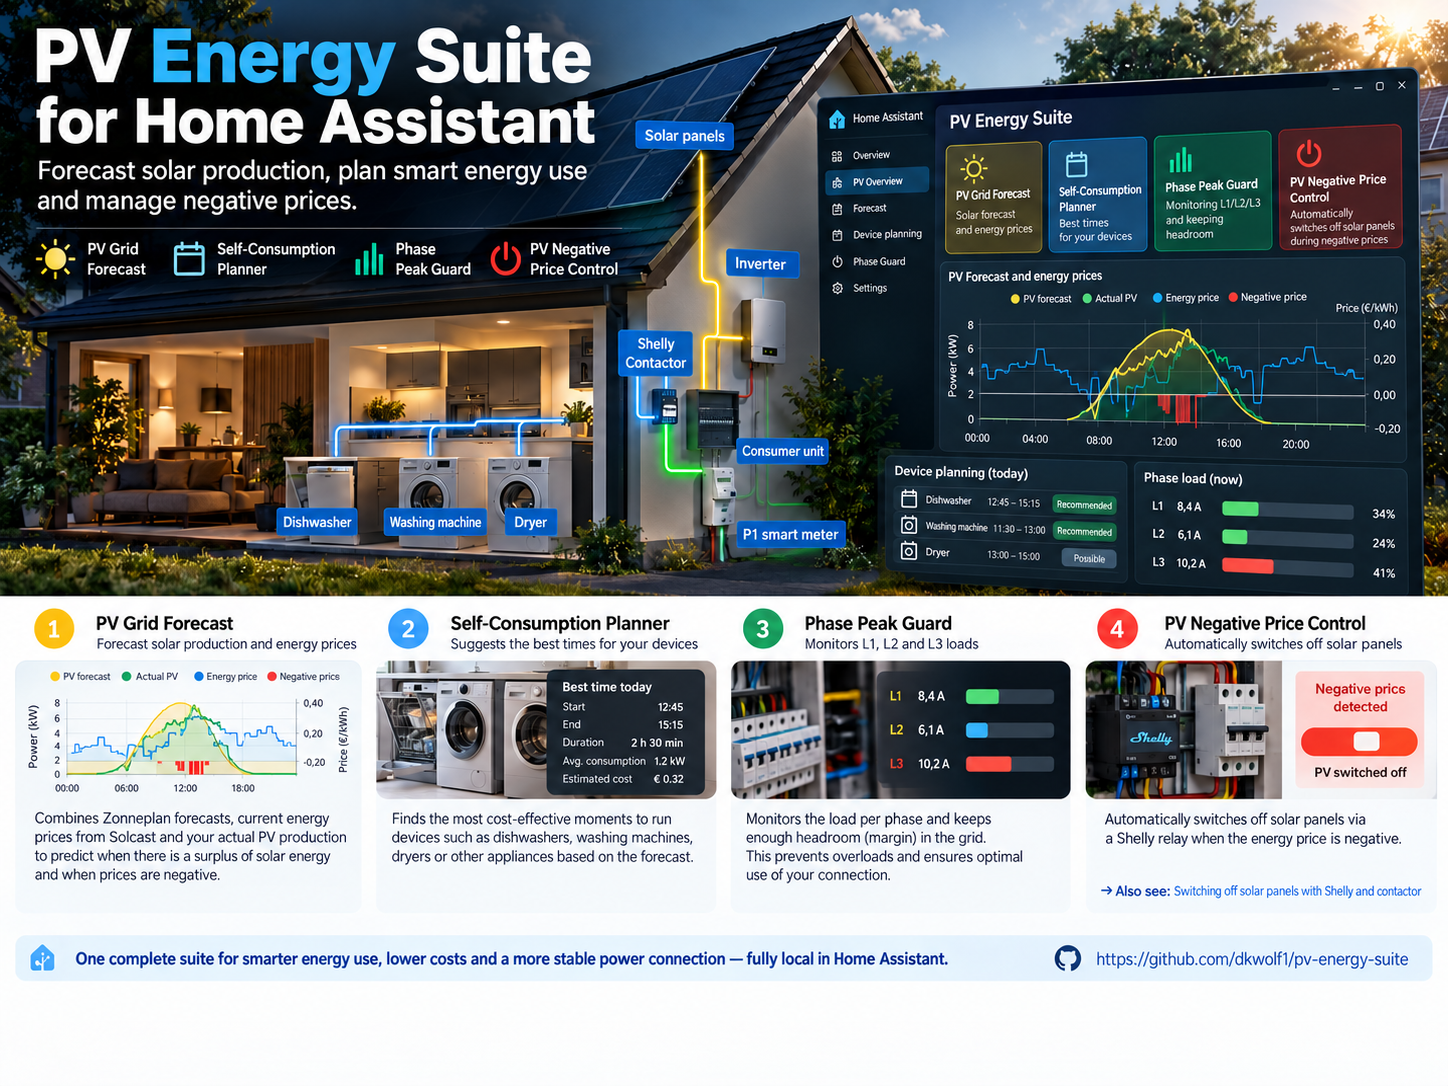
PV Grid Forecast combines quarter-hour prices, Solcast, actual PV power and P1 import/export. The result is not just a solar forecast, but a timeline on which you can assess price, expected production, actual behaviour and the grid situation side by side.
The app can also use learning and financial features when you fill in the additional ECU and Zonneplan daily sensors. Preserve existing learning JSON files when upgrading.
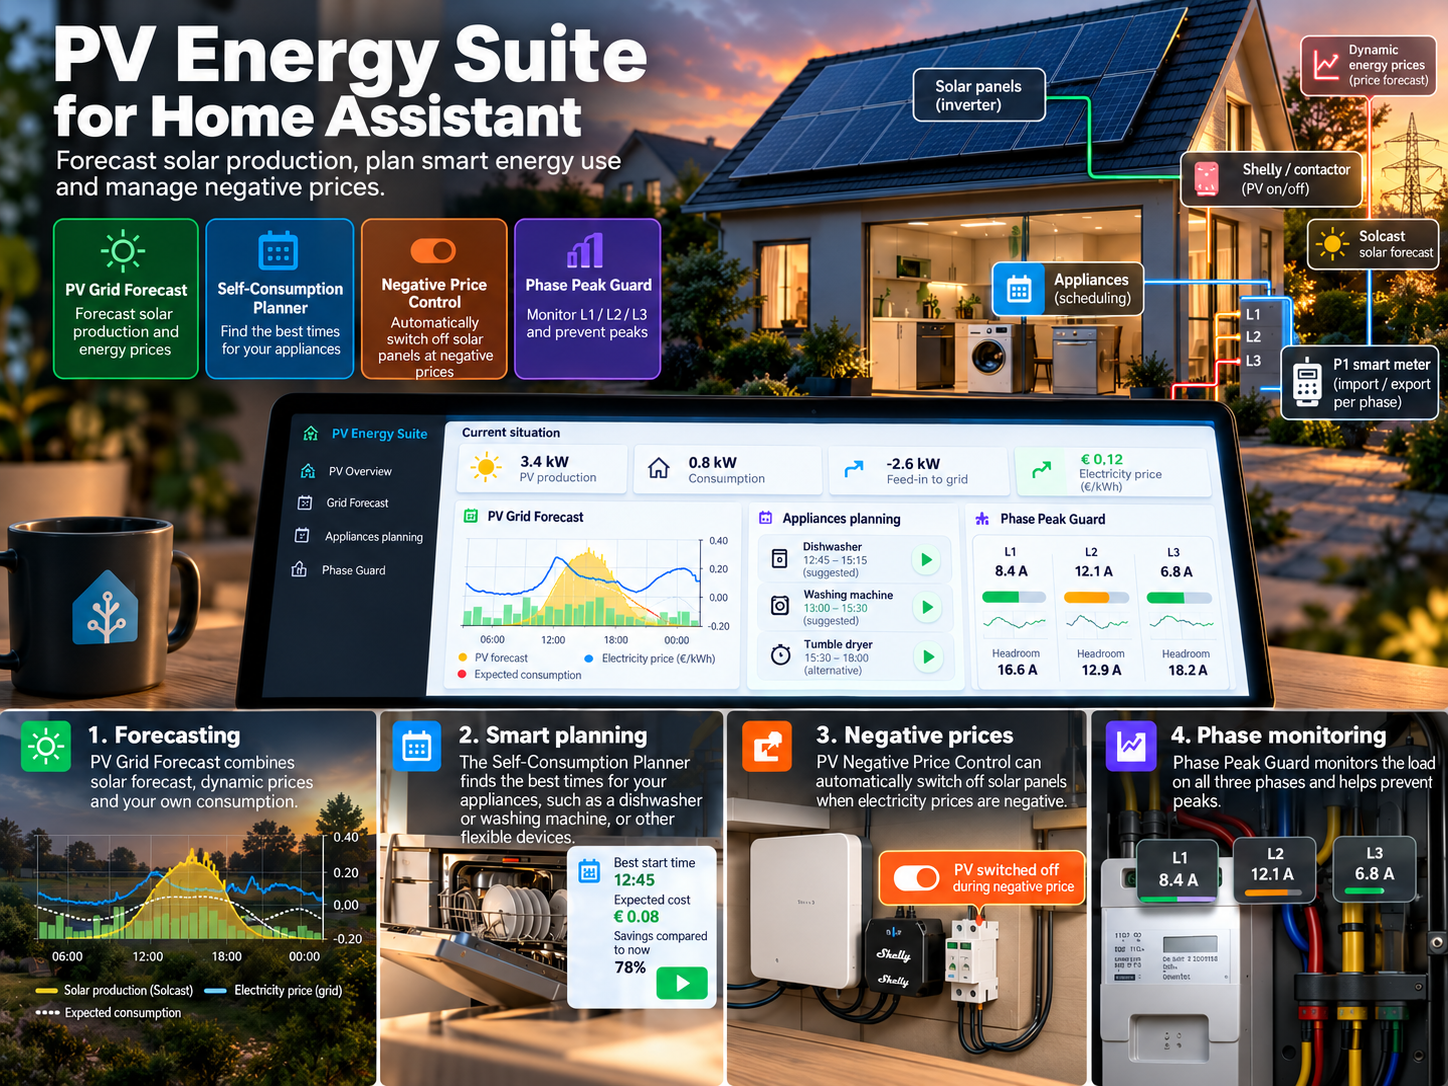
The graph is illustrative, but it captures the idea behind the suite: high solar production does not automatically mean the best time. The planner also considers price, grid import and missed feed-in value.
PV Grid Forecast can run the planner internally. According to the current README, this is the recommended route when you first want to test the suite.
6. Self-Consumption Planner – plan consumption without taking over appliances
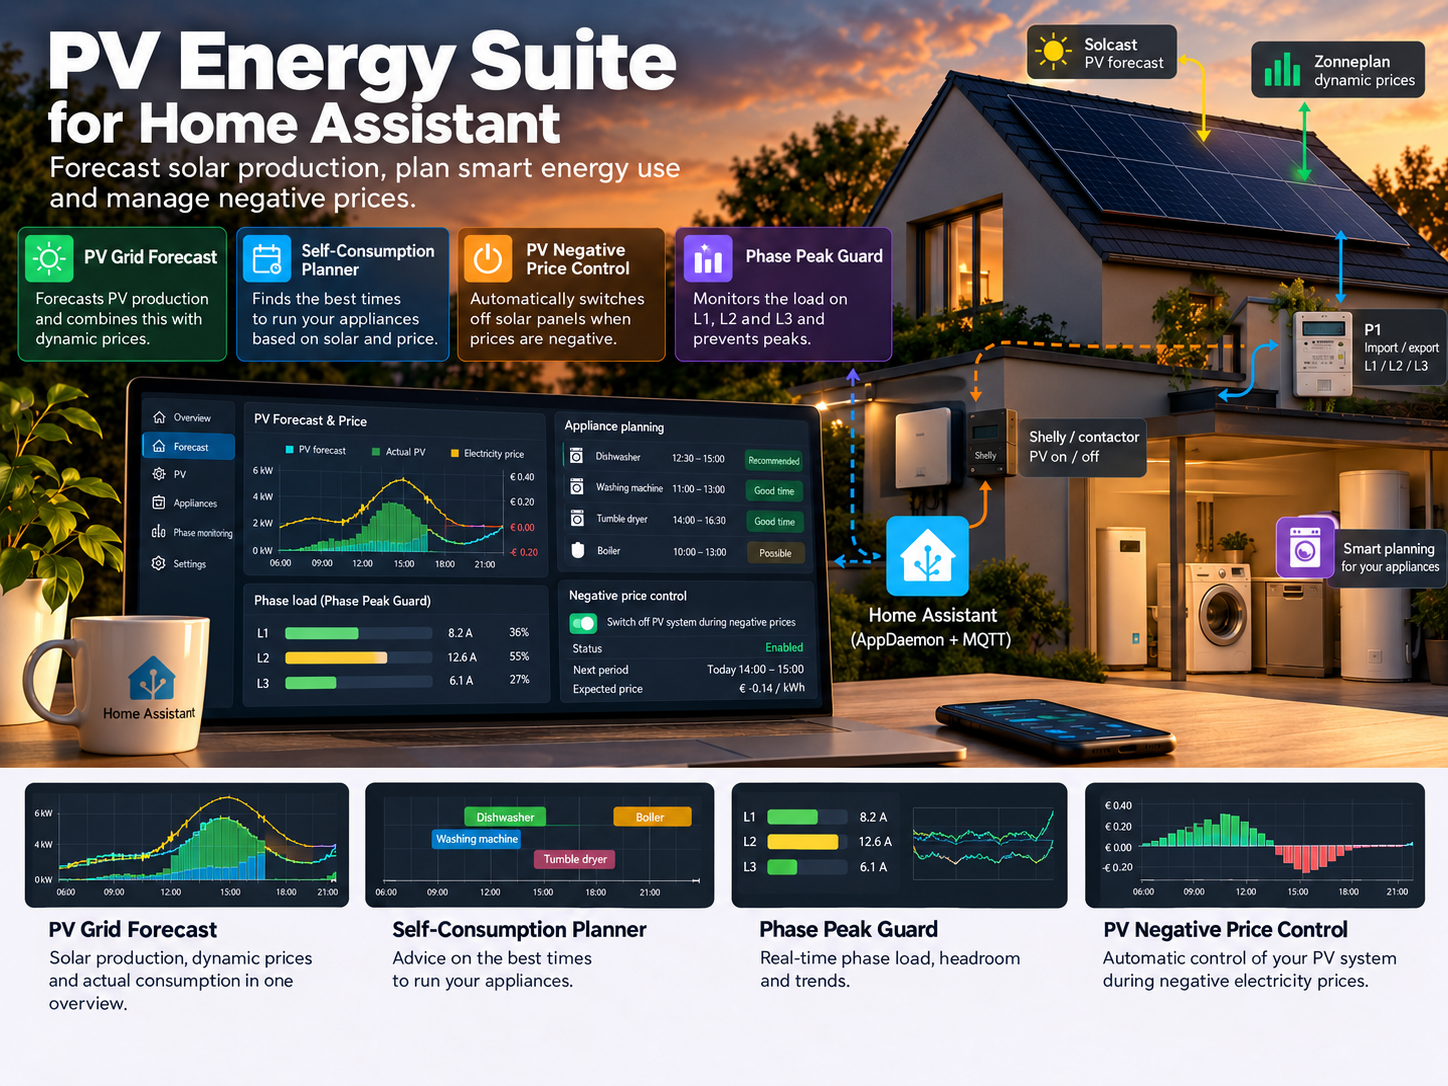
The Self-Consumption Planner is the most notable new part of the suite. It looks for a favourable start time for an appliance within an allowed time window. The standard examples are a dishwasher, washing machine and dryer, but you can add more devices.
For each device, the planner knows details such as programme duration, estimated average power, peak power, earliest start and latest finish. A device participates only when there is actual demand.
Deliberately advisory-only: the planner does not start a washing machine, dryer or dishwasher, even if Phase Guard and the forecast are installed. It only gives advice. This is not a missing feature; it is a deliberate safety and architecture choice.
7. How does the planner choose a good time window?
The code calculates every candidate window. Its score rewards using your own PV production and reducing exports, while penalising grid import, electricity costs and peak load. These components have configurable weights.
The factors considered include:
- How much of the programme’s consumption can come directly from expected PV production.
- How much feed-in that avoids.
- How much energy still has to be imported from the grid.
- What that import costs and what feed-in revenue you forgo by consuming the energy yourself.
- How high the estimated grid peak becomes during the programme.
The planner can also apply pv_safety_margin_pct, so it does not plan as though the solar forecast were guaranteed to be exact.
The principle is summarised concisely in the source code: more self-consumption and export reduction increase the score; grid import, costs and peak load decrease it. This makes the planner much more than ‘pick the sunniest hour’.
Important distinction: overall Phase Guard headroom is not used as a hard start-safety check for an appliance whose phase is unknown. The repository explicitly warns about this.
8. Optional power sensor: the planner can learn from real cycles
A device profile may optionally include a live power sensor. It must measure only that device and report power in W or kW. The planner samples it every minute.
After a completed cycle, the planner can use the measured consumption profile for future recommendations. In the code, the average power is based on the median of stored cycle averages; the estimated peak power is based on the highest observed peak in those cycles.
An isolated 0 W reading when the machine is off does not suddenly become the predicted programme consumption. Programme duration deliberately remains a manual setting because different programmes on the same appliance can vary considerably in length.
The current README makes the distinction clear: measurement helps make power estimates more realistic, but the user remains responsible for the chosen programme duration and deadline.
Practical setting: if you measure 1.2 kWh over a two-hour programme, 600 W is a reasonable initial estimate for average power. Measure peak power separately when it matters. Then use the actual power sensor so the planner can refine its model.
9. Integrated or standalone planner? Choose exactly one
The suite supports two ways of running the planner. Both publish the same MQTT Discovery IDs and topics, so they must never be active at the same time.
| Mode | Files | Configuration | Forecast basis |
|---|---|---|---|
| Forecast + planner | pv_grid_forecast.py + pv_self_consumption.py |
pv_grid_forecast: with planner_enabled: true |
Can use the forecast/learning of PV Grid Forecast |
| Standalone planner | pv_self_consumption.py + pv_self_consumption_app.py |
pv_self_consumption: from standalone_planner.yaml.example |
Reads sources itself; raw Solcast P50 |
| Forecast only | pv_grid_forecast.py |
planner_enabled: false |
No planner output |
If you are just starting: use the integrated planner. It is now the explicit quick start in the README. Switch to standalone only if you have a concrete reason.
10. Phase Peak Guard – seeing the electrical limit
Phase Peak Guard watches the three phases separately. The app publishes current, headroom and trends through MQTT Discovery. It switches nothing off; its output is intended for dashboards and human decisions.
This matters with a 3×25 A connection: total power may look normal while one phase is loaded much more heavily than the other two.
Also read the separate article: the full operation, trend analysis and interpretation of Phase Peak Guard are already covered in your existing MechScript article Phase Peak Guard – Home Assistant. We therefore keep this part of the suite guide deliberately concise.
11. Installation – the current quick start from the README
The recommended first test is Forecast + integrated planner. Proceed as follows:
- Copy
apps/pv_grid_forecast.pyandapps/pv_self_consumption.pyto the directory containing your AppDaemonapps.yaml. - Open your existing
apps.yamland take only thepv_grid_forecast:block from the example. - Set
planner_enabled: trueand do not add a separatepv_self_consumption:block. - Replace all example entities and
REPLACE_MEvalues you use with your own entity IDs. - Restart AppDaemon and check the log first, then the MQTT Discovery entities.
Do not overwrite: the current README rightly stresses that apps.yaml.example is an example. Never overwrite your existing AppDaemon configuration with the example file.
12. The essence of apps.yaml – what do you really need to understand?
The following fragment shows only the architecture. The actual repository contains more fields. Always use the current examples/apps.yaml.example as your source and replace the entity IDs with your own.
Simplified example – do not copy blindly:
pv_grid_forecast:
  module: pv_grid_forecast
  class: PVGridForecast
  planner_enabled: true
  price_quarter_entity: sensor.zonneplan_...
  solcast_today_entity: sensor.solcast_..._today
  solcast_tomorrow_entity: sensor.solcast_..._tomorrow
  ecu_power_entity: sensor.jouw_pv_vermogen
  grid_import_entity: sensor.power_consumption
  grid_export_entity: sensor.power_production
  threshold_entity: input_number.pv_negatieve_prijs_drempel
  automatic_entity: input_boolean.pv_automatisch_afschakelen
  manual_block_entity: input_boolean.pv_handmatig_geblokkeerd
  advisory_only: true
  automation_enabled: false
The key point is the division of roles: source entities come from Home Assistant; the app uses them; results reappear as MQTT Discovery entities. The planner in the public example is explicitly set to advisory_only: true and automation_enabled: false.
For Phase Guard, add a separate phase_peak_guard: block with three phase sources and its own JSON storage path.
13. Configuring appliances: option A or option B
The updated README now separates this neatly into two routes.
Option A – quick test with fixed YAML values
In one appliance block, remove all fields ending in _entity. Then enter duration, average power, peak power, earliest start and latest finish directly in YAML. Set enabled: true. Note that with fixed values, the appliance stays in the advice every day until you disable enabled again.
Option B – Home Assistant helpers and dashboard
Enable Home Assistant packages and place planner_helpers.yaml.example at packages/pv_planner_helpers.yaml. Each appliance gets six basic helpers plus an optional text helper for its power sensor.
| Helper | Function |
|---|---|
input_boolean |
The appliance needs to be scheduled |
input_number duration |
Programme duration in minutes |
input_number average power |
Initial estimate / manual value |
input_number peak power |
Expected peak |
input_datetime earliest start |
Beginning of allowed window |
input_datetime latest finish |
Deadline |
input_text power sensor |
Optional sensor.* entity for live measurement |
14. The four included dashboard views
The repository contains four Lovelace views. They are individual views for the raw YAML editor, not complete dashboards. That distinction matters.
| View | Purpose | Extra frontend cards |
|---|---|---|
| PV Grid Forecast | Forecast, grid state, consumption advice, timeline | Mushroom, Layout Card, ApexCharts, Fold Entity Row, card-mod |
| PV overview | Your own PV/P1/price/Shelly overview | Mushroom, Solar Forecast Card, Restriction Card, card-mod |
| Phase Guard | L1/L2/L3, headroom and trends | No extra cards |
| Appliance planning | Helpers and planner advice per appliance | No extra cards |
The forecast view mainly uses output that the app itself publishes through MQTT. The PV overview is different: many of its cards expect your own PV, P1, price and Shelly entities. Search for replace_me and REPLACE_WITH_ before using it.
Good order: get the apps and MQTT entities working correctly first. Import the dashboards only afterwards. An attractive dashboard cannot fix an incorrect data model.
15. What might a complete day look like in practice?
Suppose Solcast predicts substantial production around midday while quarter-hour prices fall and part of the afternoon turns negative. You also want to run the washing machine and dishwasher today.
The suite might then be used as follows:
- The forecast builds a timeline from prices, Solcast, current PV and P1.
- The planner evaluates candidate windows within the deadlines for each requested appliance.
- You might see, for example, that 11:00-13:00 is favourable for the washing machine and 12:45-15:15 for the dishwasher.
- Independently, the blueprint checks whether the current price falls below the configured PV threshold and can then operate the PV switch.
- Phase Guard monitors the three phases at the same time so the dashboard shows how much electrical headroom remains.
This example is illustrative. The suite predicts and advises using your real source data; it does not guarantee production or prices and does not start household appliances itself.
16. What does PV Energy Suite deliberately not automate?
This may be the most important section for trusting the system.
- Self-Consumption Planner does not start appliances.
- Phase Peak Guard does not switch consumers off.
- PV Grid Forecast does not operate the PV switch.
- Only the PV Negative Price Control blueprint may write to the PV Shelly/switch.
- The suite does not create your source entities; you need the appropriate integrations yourself.
- Overall phase headroom is not a hard start-safety check for an appliance on an unknown phase.
These boundaries are healthy. They stop a forecast module from suddenly controlling hardware or a planner without knowledge of the physical phase from declaring a heavy load ‘safe’.
For automatic appliance control: if you later want to start devices automatically, build a separate automation with explicit conditions and safeguards. Use the planner’s advice as input, not as implicit permission.
17. Commissioning, troubleshooting and upgrades
After installation, check the AppDaemon log before looking at the dashboards. Then confirm that the MQTT devices are online and the source entities report the right units.
Typical problems:
insufficient_data: one or more required sources are missing or provide unusable data; the planner then clears its current recommendation.- No planner entities: the integrated planner is not active, MQTT is misconfigured or AppDaemon has an error.
- Strange planning: check duration, average power, peak power, time window and source units.
- Duplicate or unstable MQTT entities: check that the integrated and standalone planners are not running together.
- PV switches the wrong way round: verify
inverted_switchagainst the physical relay logic.
One important rule for upgrades: retain existing learning JSON files. Each standalone app should also have its own storage path; do not share JSON files between apps.
Sources and links
- GitHub – dkwolf1/pv-energy-suite
- MechScript – Phase Peak Guard
- MechScript – switching off solar panels with Shelly and a contactor
18. Conclusion
PV Energy Suite is particularly interesting because it does not lump different energy questions together. Forecasting, consumption planning, phase monitoring and PV switching each have their own responsibility. This lets you start small and expand the suite in a controlled way.
The revised README makes getting started noticeably easier: first test Forecast with the integrated planner, choose one configuration method for appliances, explicitly check the source entities, and only then add dashboards and other parts. That is exactly the order I would recommend for a new installation.
In short: the suite turns separate energy data into a useful decision system: predict what is coming, advise when to consume, monitor what your electrical connection can handle, and switch automatically only where that behaviour was explicitly designed.