
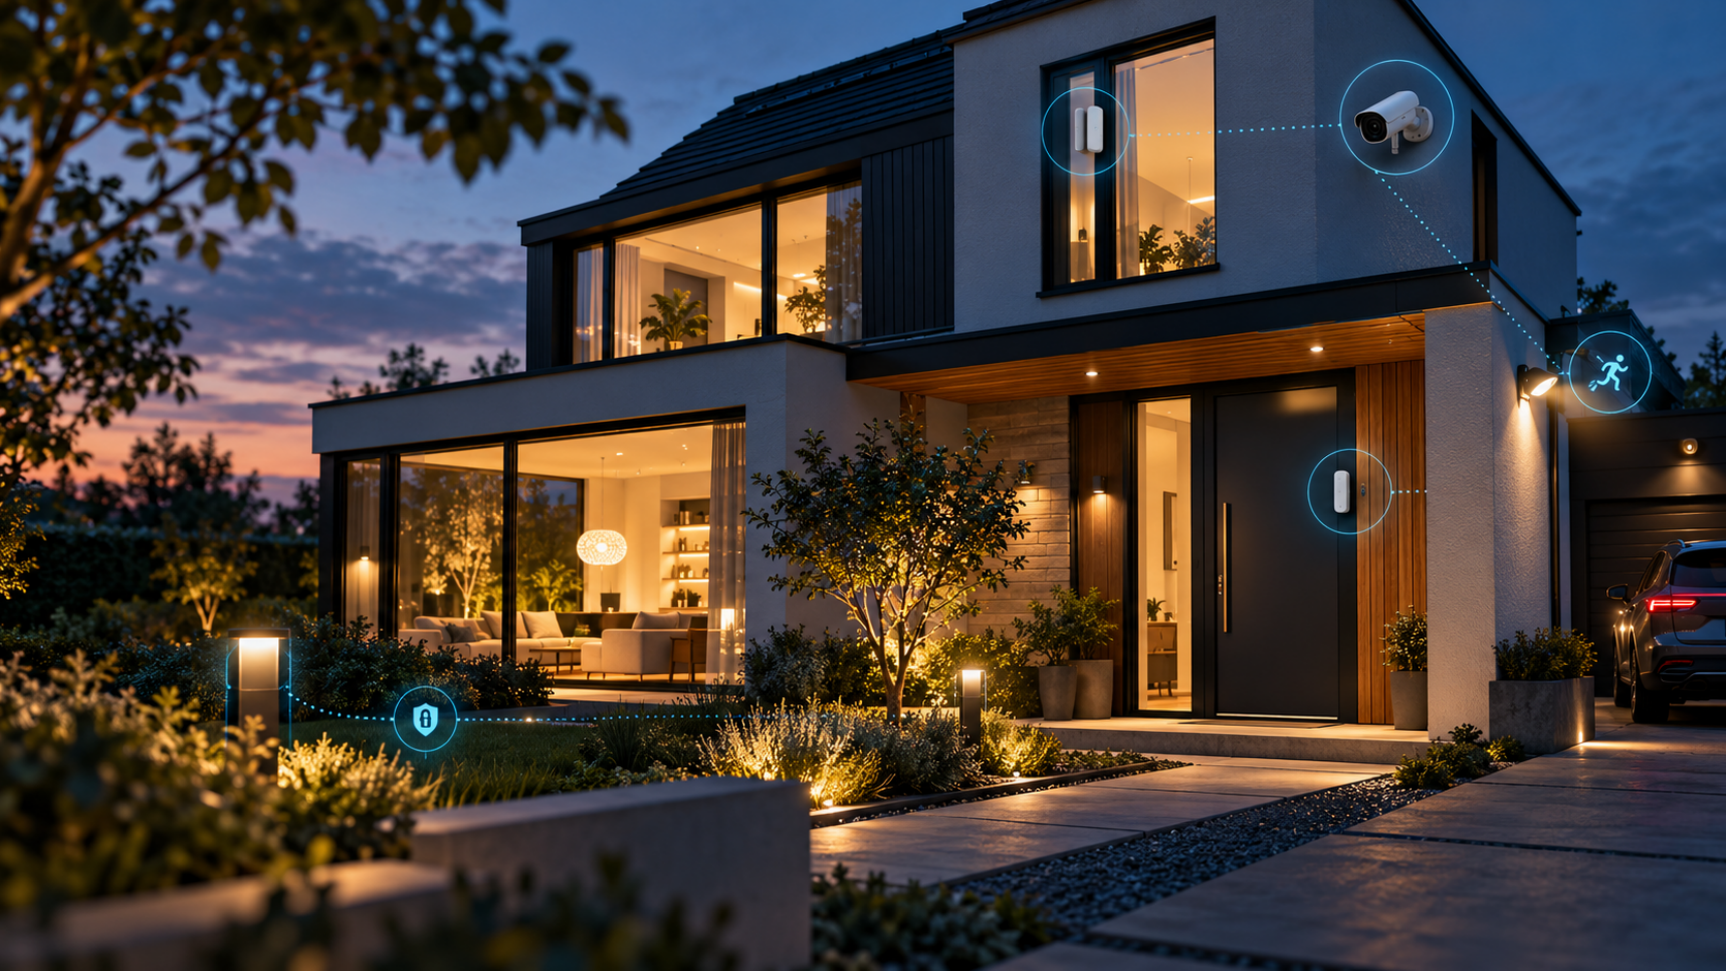
A dependable smart alarm is more than a collection of cameras and notifications. It connects risk assessment, physical security, sensors, cameras, a reliable network, clear alarm states and a plan for failures. This guide uses Home Assistant and Alarmo as central components, but many of its design principles apply elsewhere too.
Start with risks and build defense in layers
What do you want to protect, which entrances matter, and how early should an event be detected? In an apartment, the front door and hall may be central. A detached house also brings a side path, back door, patio door, garage, shed and ground-floor windows into scope. Holidays, night shifts, tools in a shed and vehicles on the drive each change the priorities.
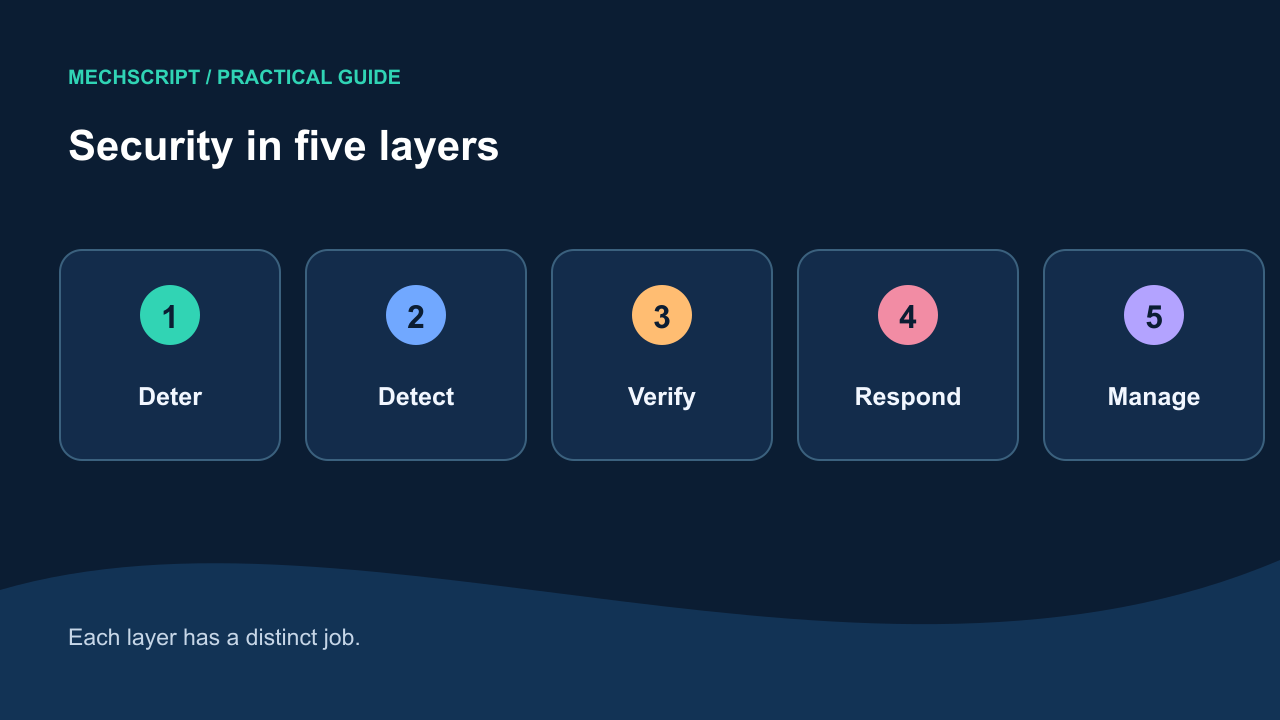
Write down the goals first. Deterrence makes protection visible; early detection ideally identifies a problem at the perimeter; verification avoids reacting blindly to every signal; response includes notification, siren, recording, lighting scene or follow-up; management keeps the setup understandable, maintainable and privacy-conscious. The best system does not have the most parts; each part has a clear purpose.
A good design has five cooperating layers: deter, detect early, verify, respond and manage. Cameras and outdoor lighting can deter. Door and window contacts monitor the perimeter. PIR or other sensors cover logical walking routes. Cameras and multiple signals help assess an alert. A siren, lighting, push notification, recording and follow-up make up the response. Give every component a clear role; more devices do not automatically mean better security.
Digital security cannot replace sound locks, lighting, visibility of entrances and other physical measures. Home Assistant cannot fix inadequate doors or windows. Start beyond the software too.
Think of sound locks, well-lit entrances, no easy foothold to vulnerable windows and protection for cameras within easy reach. Cameras without perimeter contacts mostly provide footage after the fact; interior detection alone notices an intrusion only after someone is already inside.
Zones, contacts, motion and cameras
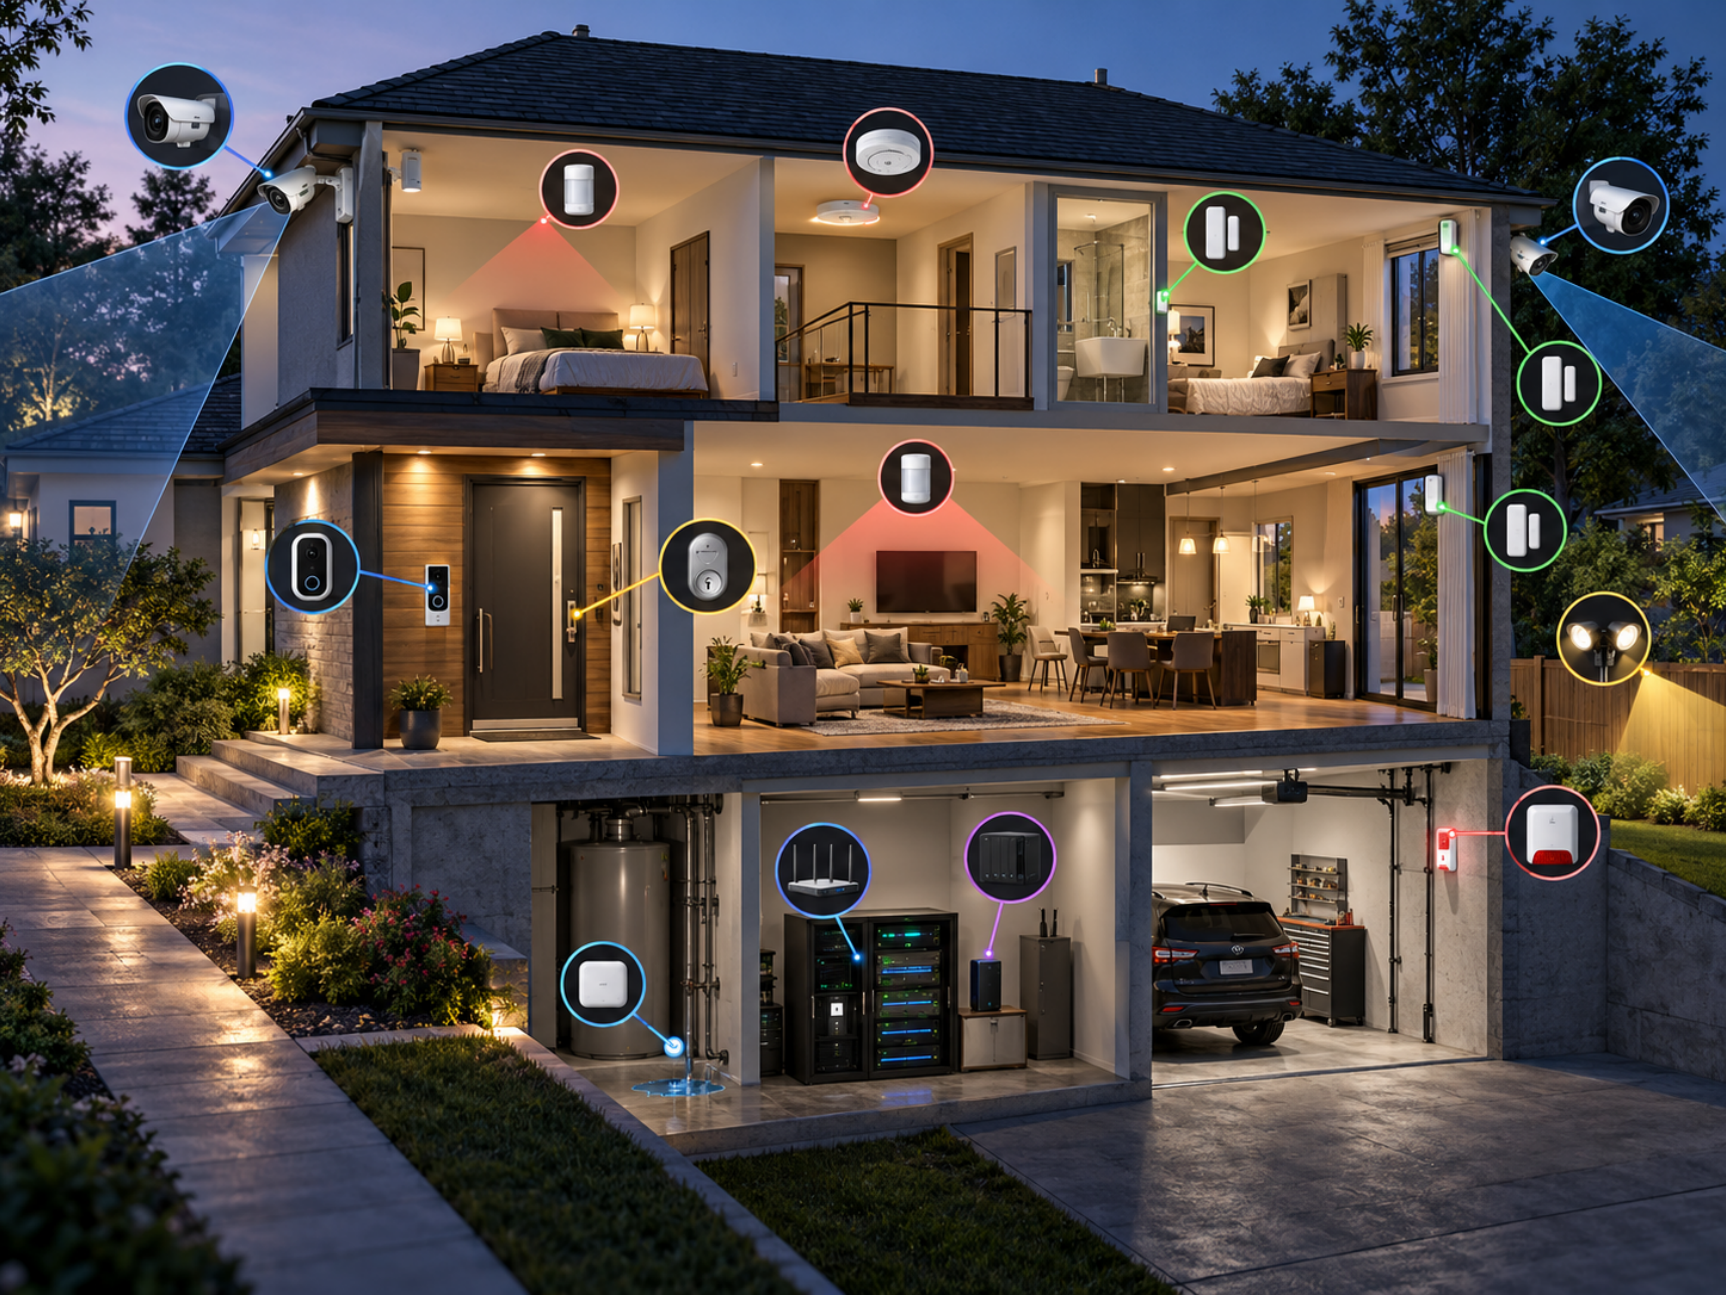
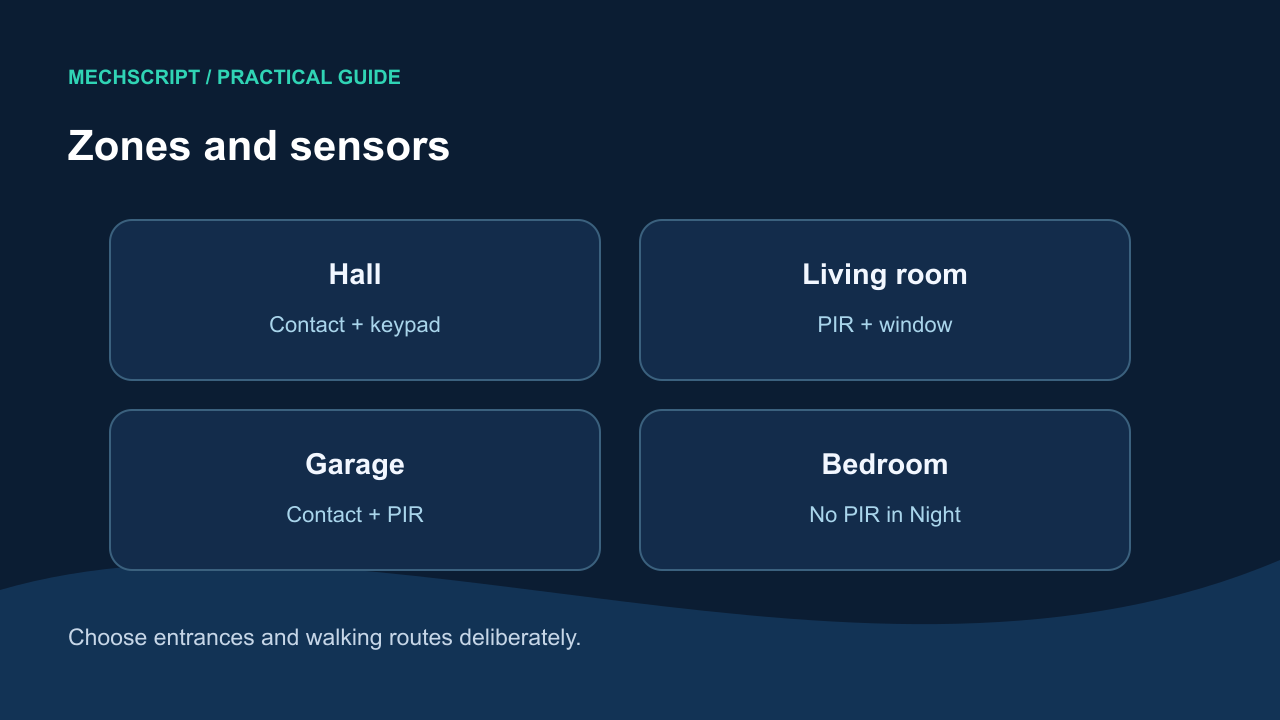
Map entrances and walking routes on a floor plan first. The hall, front door, patio door and garage are often more important than another sensor in a rarely used room. A keypad or wall panel belongs on the route residents actually take. The sample layout below is a way to think, not a universal wiring plan.
| Component | Strong role | Example placement |
|---|---|---|
| Door contact | Perimeter and open/closed state | Front, back and garage doors, patio door, shed. |
| Window contact | Perimeter | Exposed ground-floor windows and less visible sides. |
| PIR motion | Interior detection | Hall, landing, garage and other walking routes. |
| mmWave | Presence as an additional signal | Specific rooms; not the only intrusion sensor. |
| Vibration or glass-break | Supporting evidence | Vulnerable windows or patio doors. |
| Siren | Response | Indoors or outdoors, according to your strategy. |
A door contact usually supplies a clear, low-power signal with relatively few false alarms. A PIR reports movement; a camera or snapshot can then help verify it. mmWave is useful for comfort and presence, but a stable PIR is often the better primary intrusion sensor.
The division of roles matters: a contact confirms an opening, PIR movement, a camera context and the siren belongs to response. Put contacts on exposed entrances and motion sensors on logical paths. Vibration or glass-break sensors can provide additional evidence, but must suit the zone and its false-alarm risk.
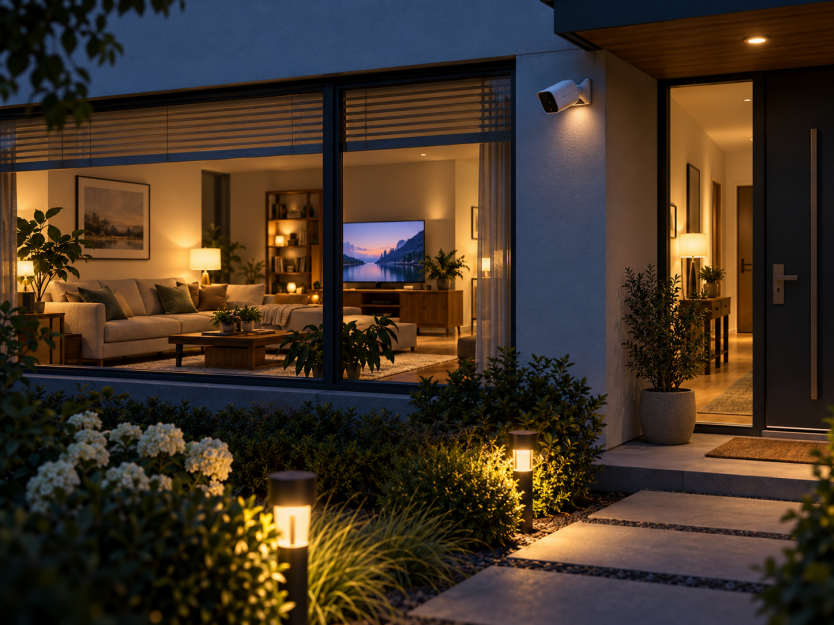
Cameras mainly serve deterrence, verification and context. Choose positions by purpose: the front door and drive for arrivals, the back door and side path for less visible routes. Use indoor cameras sparingly, for example for verification in Away mode. Test night vision and backlighting. Place a camera high enough to make simple tampering difficult, but not so high that people cannot be recognized. Resolution alone is not a useful design criterion.
Inspect the camera view at different times of day. A high camera can give an impressive overview but few recognizable details; a lower one may be easy to reach. Balance purpose, light, backlighting and tampering risk. A visible doorbell camera may deter, but a side entrance without view or sensor remains a blind spot.
Privacy-conscious cameras and storage
Aim a camera at what you need to protect: your own door, drive or garden. Exclude unnecessary pavement, street or neighboring property through placement and privacy masks. Let Home Assistant coordinate and react; an NVR, NAS or local camera platform is usually better for continuous recording, zones and retention. Cloud storage can be an additional layer, but need not be your only archive.
A local recorder reduces dependence on a vendor account and limits sensitive video sent to the cloud by default. Keep Home Assistant focused on status, integration and response rather than also making it the permanent video recorder for every camera. Decide in advance what remains visible and verifiable if the NVR, network or storage fails.
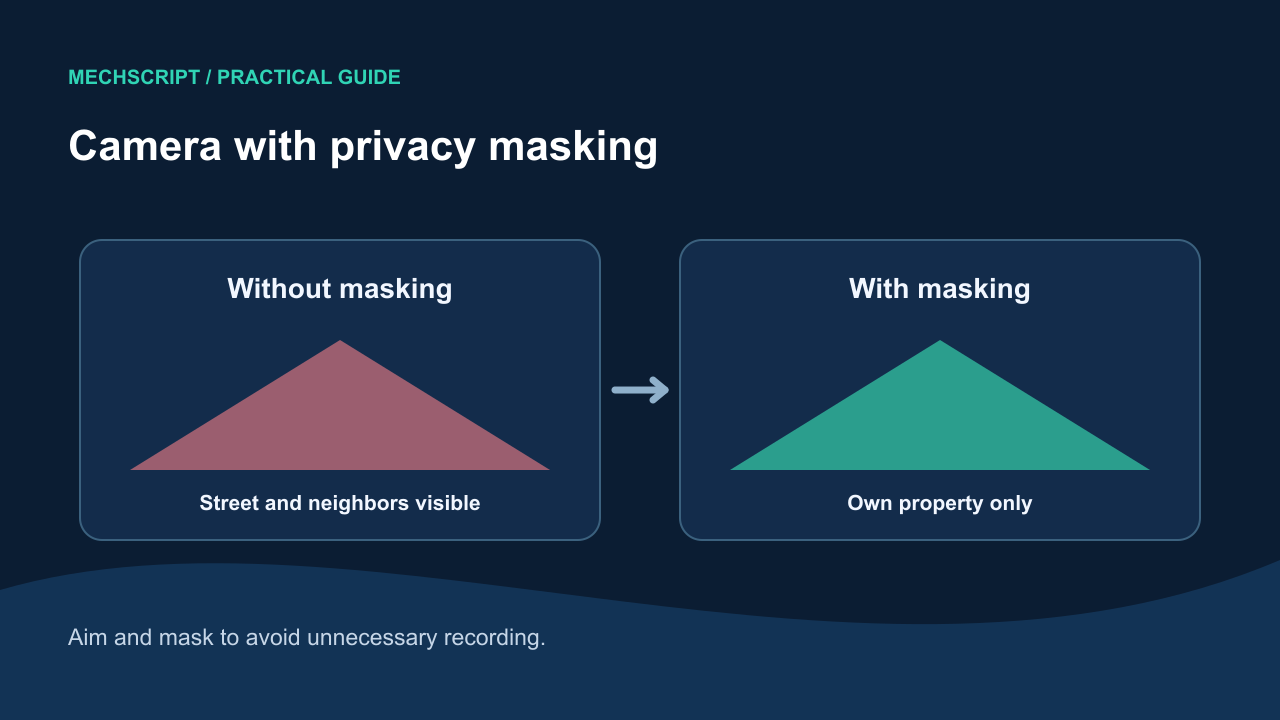
Video, snapshots, logs and presence patterns reveal a great deal about a household. Decide what to retain, for how long, who may access it and why. Limit account sharing and access to live video. In the Netherlands, the Dutch Data Protection Authority says that, in principle, you may not film the public road or your neighbors' property. If a small part of public space is unavoidably captured, check the current rules, necessity and privacy-limiting measures. Consult the Dutch Data Protection Authority's guidance; this guide is not legal advice. Check any insurance conditions as well.
Detect presence and simulate occupancy
Detection asks whether residents are home. Simulation makes an empty home appear plausibly occupied. For detection, combine several signals where possible: phones, zones, Wi-Fi, BLE, doors, motion and manual status. GPS alone can be too coarse or too slow to underpin an alarm.
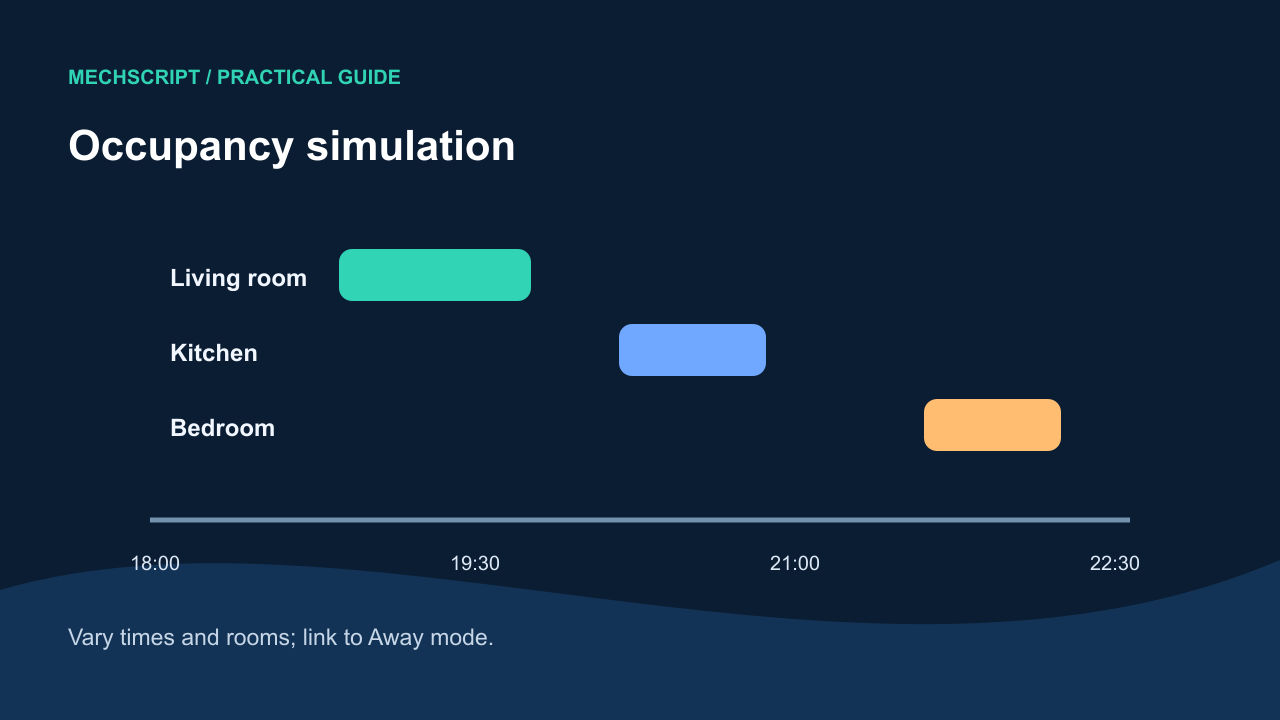
For simulation, exactly the same lighting schedule every day becomes predictable. Vary times and duration within sensible limits, use more than one room and relate actions to sunset, Away status and actual occupancy. Simulation does not replace detection or physical security.
Secure the infrastructure too
An attractive Alarmo configuration helps little if Wi-Fi is unstable, cameras depend entirely on a cloud or the router fails during a brief power dip. Make the critical chain local and reliable: router, switch, Wi-Fi, Home Assistant, Zigbee coordinator and preferably camera storage. Where useful, choose wired cameras, stable local addresses or hostnames and a UPS for the router, switch, Home Assistant and storage.
Separate IoT devices from primary clients where possible, while allowing the connections Home Assistant and the NVR need. Monitor unavailable entities, battery levels, free storage and network outages. Use strong unique passwords, MFA, limited rights and safe remote access. Minimize cloud dependence for core functions; document which off-site notifications disappear when the internet fails.
From sensor to response: clear architecture
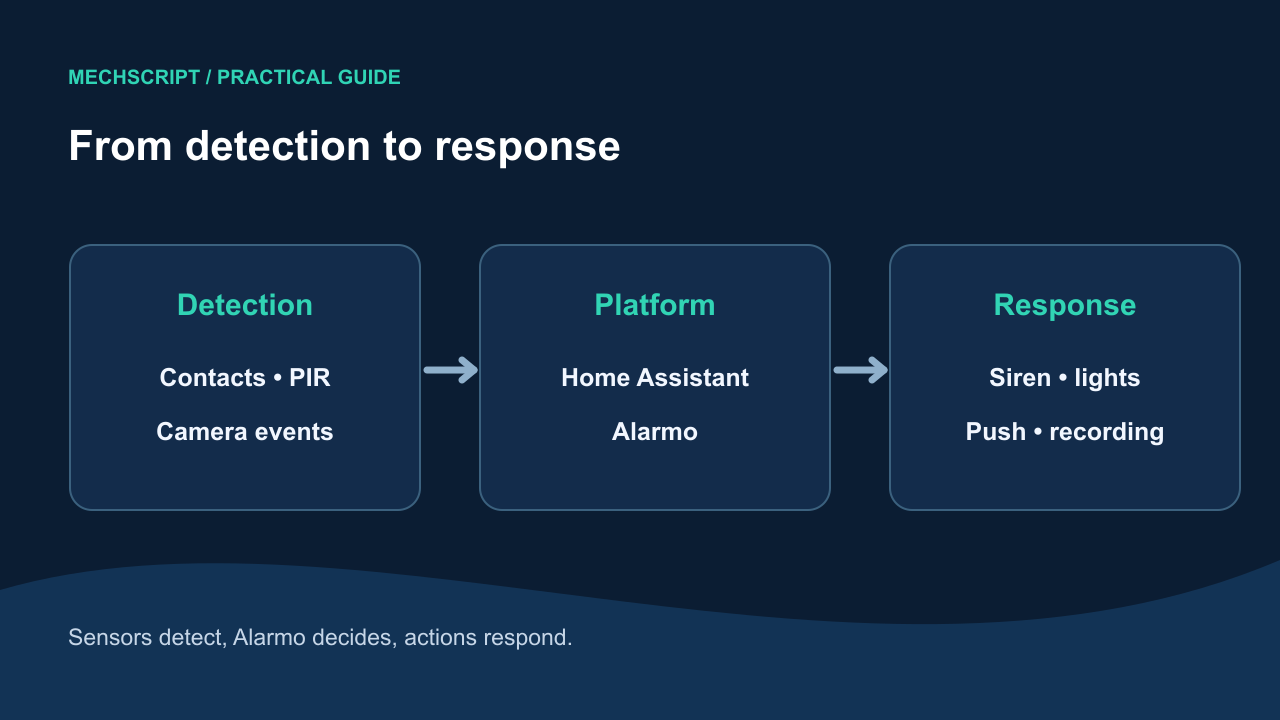
Let sensors and camera events detect, Home Assistant bring entities together, Alarmo determine alarm state, and separate automations or scripts carry out actions. You can then replace a siren, camera or notification channel without rebuilding all your logic. Avoid one enormous automation that mixes detection, alarm state and every action.
Install Alarmo and model the home
Alarmo is a Home Assistant integration that turns existing entities into an alarm system. Basic setup happens through its UI; it can manage arm modes, areas, delays, users/codes, actions and alarm state. According to the project, installation uses HACS, a Home Assistant restart and then adding the integration under Settings → Devices & services. Next, connect sensors, modes, delays, users and actions, and add a card or dashboard for daily use. Alarmo is a state machine and management layer, not a substitute for good sensor design.
| Mode | Use | Typical sensors |
|---|---|---|
| Away | Nobody home; full protection. | Perimeter, motion sensors, garage, shed and relevant camera events. |
| Home | Residents home; mainly perimeter active. | Door and window contacts, garage/shed and perhaps outside zones. |
| Night | Nighttime; preserve safe indoor routes. | Perimeter and selected downstairs or garage PIR, not the bedroom route. |
| Separate area | Protect one part independently. | For example a garage, shed or home office. |
Use entry delay only at genuine access routes residents normally use, such as the front or garage door. A patio door usually does not need a long delay. Exit delay gives time to leave after arming. Ready-to-arm shows whether critical openings are closed; show that status and, where appropriate, block arming while a critical sensor remains open.
For advanced setups, sensor groups can combine signals to reduce false positives, such as a door contact followed by a hall PIR. Areas let a garage or shed be armed separately; a master alarm can coordinate several areas. Users and PINs support rights, logging and temporary access. Treat actionable notifications that disarm the alarm carefully: convenience must not bypass authentication.
A sensor group could also require two motion sensors within a time window rather than “every movement = alarm”. Areas help when a garage or shed should remain secured differently from living space. User-specific codes help identify who acted and manage temporary access; grant each account only the needed permissions. A master alarm can show separate zones centrally.
Alarm states and delays
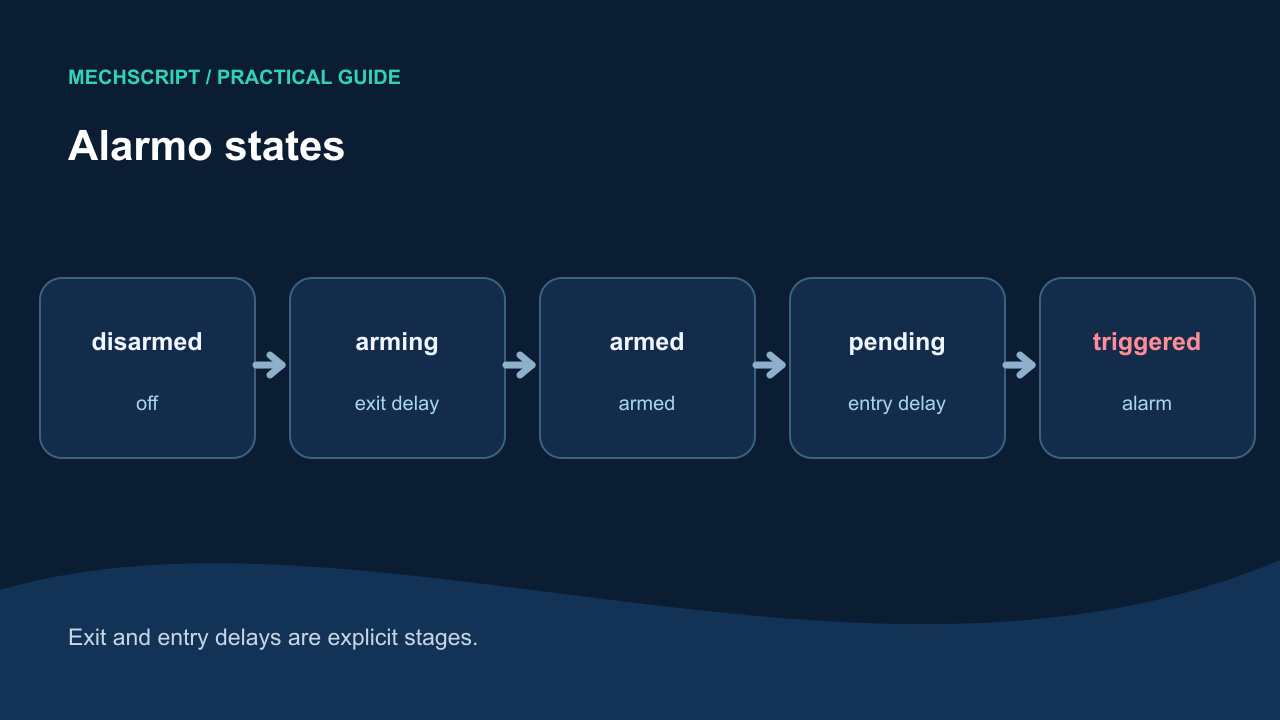
An alarm is not an ordinary on/off switch. During arming, the exit time runs; then the system becomes armed. A permitted entrance can first become pending during the entry time. It reaches triggered only if it is not disarmed in time. An unexpected back-door or garage trigger can escalate immediately, depending on your design. Decide this for each sensor and mode.
Four example automations
The examples below are starting points, not a production-ready alarm system. Check your own entity IDs, access, notification destinations, authentication and failure behavior. Keep Alarmo responsible for alarm state and have focused automations react to it.
1. Arm Night when everyone is home
alias: Automatically arm Alarmo for Night
triggers:
  - trigger: time
    at: "23:30:00"
conditions:
  - condition: state
    entity_id: alarm_control_panel.alarmo
    state: disarmed
  - condition: state
    entity_id: person.dennis
    state: home
  - condition: state
    entity_id: binary_sensor.woonkamer_beweging
    state: "off"
  - condition: state
    entity_id: binary_sensor.achterdeur_contact
    state: "off"
actions:
  - action: alarm_control_panel.alarm_arm_night
    target:
      entity_id: alarm_control_panel.alarmo
mode: single
2. Notify when arming fails
alias: Alarmo ready-to-arm warning
triggers:
  - trigger: event
    event_type: alarmo_failed_to_arm
actions:
  - action: notify.mobile_app_iphone
    data:
      title: Alarmo could not arm
      message: >-
        Check open sensors or the ready-to-arm status.
mode: queued
3. Siren, lights and snapshot on an alarm
alias: Alarmo alarm response
triggers:
  - trigger: state
    entity_id: alarm_control_panel.alarmo
    to: triggered
actions:
  - action: switch.turn_on
    target:
      entity_id: switch.binnensirene
  - action: scene.turn_on
    target:
      entity_id: scene.alarmscene_beneden
  - action: camera.snapshot
    data:
      entity_id: camera.voordeur
      filename: /media/voordeur_alarm.jpg
  - action: notify.mobile_app_iphone
    data:
      title: Alarm triggered
      message: Alarmo has triggered. Check the cameras now.
      data:
        image: /media/local/voordeur_alarm.jpg
mode: single
4. Simulate occupancy only in Away mode
alias: Living-room occupancy simulation
triggers:
  - trigger: sun
    event: sunset
    offset: "00:20:00"
conditions:
  - condition: state
    entity_id: alarm_control_panel.alarmo
    state: armed_away
actions:
  - action: light.turn_on
    target:
      entity_id: light.woonkamer
  - delay: "01:13:00"
  - action: light.turn_off
    target:
      entity_id: light.woonkamer
mode: single
Several understandable automations are better than one opaque one. In a real home, occupancy simulation should vary timing and rooms; the fixed-time example only illustrates the principle.
Dashboards, notifications and physical fallback
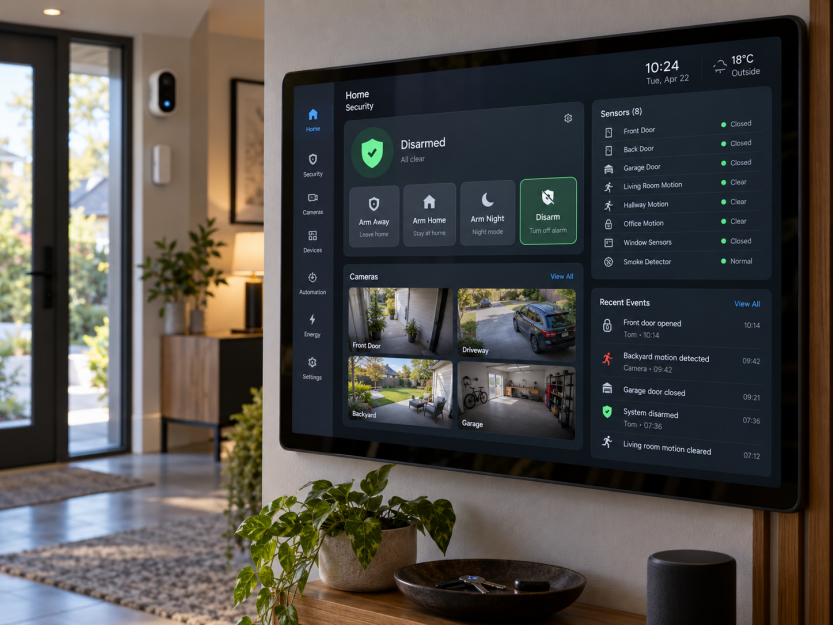
All residents must be able to understand the alarm. Show current state, open sensors, ready-to-arm, recent triggers, battery status and relevant cameras. Ideally, a notification identifies sensor/zone, mode, context and a clear next step. A snapshot can aid verification, but share images only as far as necessary. An actionable notification could open a dashboard or, after verification, stop a siren; disarming requires a careful security decision and clear authentication.
Where possible, an important message should also say who armed the system and offer a concrete next step: inspect camera, check sensor, disarm securely or take follow-up action. A vague “Alarm!” push is less helpful, especially to other household members. Reliable physical control and visible status are part of usability, not merely emergency features.
Provide a physical keypad, clear status indication or another simple fallback too. Your partner or family must be able to use the home when Home Assistant or a phone is unavailable.
Design for failures and maintenance
| Failure | Effect | What may keep working? | Measure |
|---|---|---|---|
| Internet down | External alerts and cloud functions limited. | Local sensors, Alarmo and local dashboards. | Local core functions and a clear notification fallback. |
| Home Assistant restarts | Alarmo and automations temporarily inactive. | Some independent devices. | Stable hardware, updates, backups and testing. |
| Zigbee coordinator down | Zigbee sensors unreachable. | Wired or IP components. | Good coordinator, placement and monitoring. |
| Power outage | Devices without backup power stop. | Only components on a UPS. | UPS for router, switch, Home Assistant and storage. |
| Camera storage full | No useful new recordings. | Live view may still work. | Monitor retention and storage alerts. |
As a test, disconnect the internet, restart Home Assistant in a controlled way and simulate a flat sensor battery. This reveals what actually keeps working. Periodically test arming, disarming, entry delay and siren; inspect camera images by day and at night; monitor batteries, unavailable entities, space and retention. Back up Home Assistant and test restoration. Document zones, PIN policy and automations, and reassess yearly whether the setup still fits the home and residents.
The core is a coherent system: physical security, layered detection, privacy-conscious verification, Alarmo as the central state layer, modular response and demonstrated resilience. That makes it useful long after the first gadgets are installed.
Reference checklist
- Have relevant entrances been mapped and covered with appropriate contacts or other detection?
- Is motion detection on actual walking routes, and are cameras strategically and privacy-consciously positioned?
- Is video recorded locally or with a deliberate cloud addition, defined retention and restricted access?
- Do Away, Home, Night, areas and entry/exit delays suit the residents' real behaviour?
- Are ready-to-arm, users, PINs, notifications, dashboards and physical fallback usable by the whole household?
- Do automations respond to Alarmo states rather than uncoordinated individual sensors?
- Are UPS, backups, a restore test, battery/storage monitoring and internet/Home Assistant outage tests in place?
A smart alarm is a living system. Door contacts can shift, batteries run flat, Wi-Fi changes and storage fills. Test periodically in daylight and darkness, document zones and PIN policy, and reassess yearly whether the design still suits the home and residents. Part 2: the technical Alarmo guide develops the flows, events and YAML further.